Changing Modified and Created Date in MAC
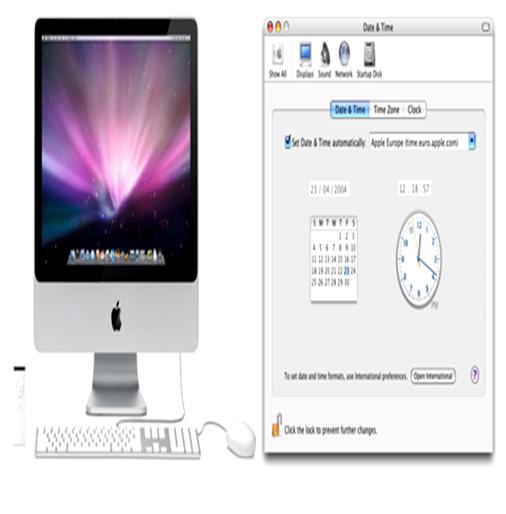
Are you searching for a tool or method to change the already modified and created date in MAC?
Then the “File Properties Editor” is what you are looking for.
Besides being an efficient way to change a variety of factors related to files, this multilingual tool sets your creation and modification dates to the current day or any other day. You can lock the changed date to prevent it from being altered and can unlock it whenever you want to make changes. What makes it a super choice is its “ease-of-use” as it doesn’t require any installation.
It should work on both major releases of MAC, i.e., 10.5 Leopard and 10.4 Tiger.


Instructions
-
1
Date Format Key:
The date must be formatted as:
YYYY – The year – you can skip the first two digits/century
MM – The month of the year, from 1 to 12.
DD – The day of the month, from 1 to 31.
hh – The hour of the day, from 0 to 23.
mm – The minute of the hour, from 0 to 59. -
2
How to change the date modified attribute of a file?
Follow the given below simple steps to change the date modified attributes of a file on MAC:
a: Open up the Terminal application:
It is a simple activity where you just have to highlight the “Applications” from the “Places” list, on the left side of the opened Finder Window. Now click the "Utilities" folder and then double-click on "Terminal or Terminal.app.” Otherwise, you can open the terminal application by iTerm.
b: Enter the Code: Once you open the terminal application, type “touch -mt YYYYMMDDhhmm” into the blank terminal window, without hitting the enter/return option. Now replace the “YYYYMMDDhhmm” portion with your required date information
c: Find the File you wish to adjust: Open a “Finder” window and find the specific file you would like to alter. Now drag this file to the Terminal Window and release it. Given below is what you should type into the terminal at this point:
touch -mt 200801120000 /Volumes/Mac\ HD/Pictures/somefile.jpg
Change the “200801120000” to the desired date and replace the “/Volumes/Mac\ HD/Pictures/somefile.jpg” part with an appropriate path to the file which you wish to change the date for.
d: Wrap up: Once all is in order, simple press the “Return” Key. That is s all there is to it. -
3
How to change the date created attribute of a file?
Given below are the simple steps involved in the changing the date created attributes of a file in MAC:
a: Open Terminal Application: First of all, move your cursor to the “Places” list, located on the left side of the opened Finder Window, and highlight “Applications.” Now hit the "Utilities" folder and then double-click on the “Terminal.app.” Otherwise, use iTerm for this purpose.
b: Set the Desired Date Information: Type “touch -t 201212211111” in the command line (terminal), without clicking enter/return. Now replace the “YYYYMMDDhhmm” with the date information that you wish for.
c: Get at the File you wish to alter: Open a Finder Window by clicking on the dock icon and hit upon the file you would like to change. Now use your cursor to drag this file into the file. You will notice that a path will be automatically added to the end of the line you just typed. The entire line should look like the one given below:
d: Modify the Date and Path: Open a Finder window and locate the file you wish to modify. Drag and drop the file into the Terminal window, the file and path will be added to the end of the line you just typed.
Here is an example of what the line should look like:
touch –t 200005151125 /Volumes/Mac\ HD/Pictures/myfile.jpg
Change “20121221111” in the above example with the date you want and replace “/Volumes/Mac\ HD/Pictures/somefile.jpg” with the right path to the file you desire to modify the date for.
e: Bring it to a Close: Once all in proper order, press the enter/return key to bring it a successful close. -
4
How to batch update the date modified attribute of multiple files?
Given below are the supplementary steps to batch update the date modified attribute of multiple files:
a: Look into the Top Directory: First of all, confirm that all the files that you want to alter are in the top directory of the same folder. Make sure not to store the file in this folder in case if you don’t want them to be changed.
b: Open up the Terminal Application: Now go through the given below steps to open up the Terminal Application:
/Applications/Utilities/Terminal.app
c: Change the Date Information: Type touch -mt YYYYMMDDhhmm into the blank Terminal window, without hitting the return/enter button. Do not change the “touch –mt” and replace the “YYYYMMDDhhmm” with the desired date setting.
d: Identify the Files to me modified: Open a new Finder window and then find out the particular files that you want to alter. Once you identify, drag them into the Terminal Window and release the cursor. Given below is the simple command that you should type into the terminal at this point:
touch -mt 200801120000 /Volumes/Mac\ HD/Pictures/Album
e: Set the Command: Add /* to the end of the command you have just typed (above one). Your entire command should look like the one given below:
touch -mt 200801120000 /Volumes/Mac\ HD/Pictures/Album
In case if you are just directing a particular file type, simply add its extension like *.png or *.jpg
f: Close it: Once you place all information in proper order, press the return key to conclude. -
5
How to batch update the date created attribute of multiple files?
Follow the given below steps to batch update the date created attribute of multiple files:
a: Check Top Directory: Go through the top directory in order to make sure that the files you want to alter are placed in it. Don’t place those files in it that don’t require changes.
b: Open the Terminal Application: Given below is the process to open it:
/Applications/Utilities/Terminal.app
c: Make Changes in the Time Settings: Type touch –mt YYYYMMDDhhmm into the terminal, making sure not to press Return/Enter bottom. Once you enter it, replace the YYYYMMDDhhmm with the desired date changes.
d: Set the Files that Require Changes: Open up the Finder window and find out the folder, containing the files you desire to adjust. Now drag the file into the Terminal Window. Now type the given below command into the terminal:
touch -t 201212211111 /Volumes/Mac\ HD/Pictures/Album
Adjust the 201212211111 part with your desired date and replace /Volumes/Mac\ HD/Pictures/Album with an authentic path to the folder, containing the files that you want to modify the date for.
e: Enter Command: Type /* to at the end of the recently typed command. For specific file type, simply include extensions like *.jpg or *.png. The command after adding it should look like:
touch -t 201212211111 /Volumes/Mac\ HD/Pictures/Album/*
f: Conclude: Press the “Return” bottom to lock successfully.