How to Sew Buttons on Clothes
Sometimes when you get your favorite shirt back from the drycleaners, you find one of its button loose or completely falling off. This is a common issue which almost every one faces in his/her life. Most of the shirt manufacturers include extra sleeve and shirt buttons with all their shirts. But the problem is still there, as most of us do not know how to sew buttons on clothes. This becomes really irritating especially when you are in a hurry and you have to attend an important meeting, or you have to go to a party etc.
Things Required:
– the garment
– the button (try to use the button which should match with your previous one)
– Sewing needle
– Thread
– Scissor
– Thimble (may be useful to protect finger and push the needle when sewing)


Instructions
-
1
Button Up
It is important to find either an identical button to the one that needs replacing or one that matches it well. If you are unable to find similar buttons, you may have to replace all the buttons on the garment with a new set of matching ones. Buttons can be found and purchased from your local fabric retailer.

-
2
Right Spot
Now that you have the button, you must determine the exact spot on the garment where the button should go. Usually, some indication of the previous button should be visible such as holes left by the thread, or can be determined based on equal distance between the buttons above and below. Once determined, place the button on the correct spot.

-
3
Needle and Thread
Use a piece of thread that is roughly the length of your arm. Hold one end with your finger and thumb and extend arm fully. Cut the thread at the point that is near your armpit using your scissor.
Wet one tip of the thread with your saliva and slide it through the "eye" of your needle, a space found at the top. Once you have done so, pull the thread through the hole holding both ends of the thread until they match in length and the needle is in the middle.
Secure the end of the thread by knotting both ends together twice.

-
4
Get to Work
Now that you have your needle and thread ready, lift the button you had placed on the garment. At that same spot, push the needle through the material from the front side to the back and again from the back side to the front. The needle should now be pointing up towards you. -
5
Save a Space
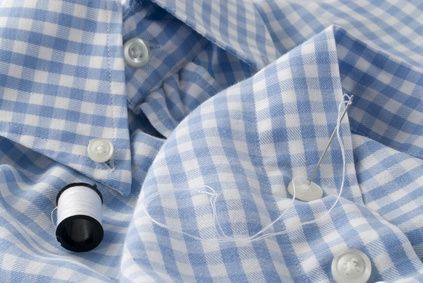
Place one of the button's holes on top of the needle passing the thread through the hole. Once the button has been placed on the garment it is almost ready to be sewn on. The most important thing to do is leave a space between the button and the material so that the material surrounding the button hole has space to secure the button.
In order to do this effectively, we suggest placing one of your other needles underneath the centre of the button. This leaves space while also allowing you access to all the button's holes.
Note: If the material is thick, you may want to leave additional space by lifting one side of the button slightly as you sew. -
6
In One, Out The Other
With your "space maker" in place, it is now time to sew the button on. Take the needle and pass it through the hole directly underneath the one the thread is currently going through. Push the thread through the other side of the material and pull it until the thread is all the way through.
If you have a button with four holes, push the needle and thread back up towards you through one of the other holes. Push the needle through the last empty hole and pull it downwards as you did for the first two holes. Repeat this process alternating between both sides of the four hole buttons a few times. This will secure the button well.

-
7
The Neck
Once you are satisfied with the amount of thread passing through the button's holes, it is time to fortify the space between button and garment. In order to do this, pass the needle from the backside of the material through to the top, but not into a button hole. Using the remaining thread, wind the thread around the thread at the back of the button approximately six times.
This creates what is known as the neck, allowing your button to work properly and securely. -
8
Knot and Finish
Wrap the thread around the button one last time. Pass the needle through the loop of thread that remains to form a knot at the base of the button.
Finish your process by passing the needle through the material once again at the base of the button and tie a knot on the other side of the material secure the button one last time.
To finish, push the needle back up through the material towards you and cut the thread as close to the material as possible.
There you have it, a perfectly secured button that's ready to go.

- Sewing needle
- Thread
- Scissor
- Thimble (may be useful to protect finger and push the needle when sewing)Next%20stop%3A%20Pinterest "Pin It")


