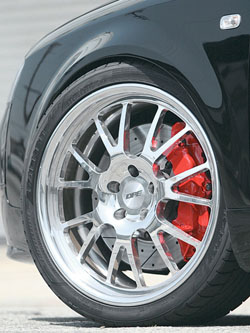
How to Clean Car Rims at Home

Brake dust, mud, salt stains – all of these things are nightmares to car rims. We all know regular car washes don’t often get the job done when it comes to cleaning the rims, which are paramount to the overall beauty of the car. Luckily, there are a number of cleaning agents and various other products that make cleaning our rims a whole lot easier.
The following is a Step by Step Guide to cleaning your rims in the easiest and most effective way possible. It’s not as easy as sitting in a car wash, but often the things worth having, have to be worked for. Think about those rims shining on your car. Let that get you out there.
Things Required:
– Garden hose (a nozzle with a spray and jet setting is a bonus)
– Bucket
– A small brush (if you’re really ambitious an old tooth brush works great)
– Cleaning rag
– Cleaning agent
Instructions
-
1
Cool Rims
First and foremost, a helpful tip is to allow your rims to be at a cool temperature before washing. We're not talking really low temperatures here. You just need them to be in a shaded area. Try not to wash them too soon after having driven as well. This is especially true for chrome rims. Spotting can occur if the rims aren't cooled down. -
2
Cleaning Agent
As for a cleaning agent, there are a lot of options available. Your local hardware or home stores will have a wide selection. Speak with an associate or search the web to find out what cleaner would suit your rims.
To be honest, even dish washing soap works extremely well. -
3
Spraying the Rims
Fill the bucket with the recommended amount of the cleaning agent. Add water until the bucket is filled and the soap is mixed. Once this has been done, adjust the nozzle to a preferred setting and begin spraying the rims. Work your way around the rims in circles, starting from the top and working your way downwards. Be sure to clean in each spoke and crevice. The better the spraying job the easier the rest of the cleaning. -
4
Putting the Bucket to Use
Once you have sprayed all the dirt and debris off, it's time to put some sweat equity into the job. Wet the rag with the soap water and begin cleaning the rims. Move in a circular motion from the outside in. Be sure to apply the cleaning solution to the entire rim. Don't be afraid to rinse the rag every so often and apply more of the soap water. There should be plenty and there's no such thing as rims that are too clean. -
5
Brushing
Before we remove the soap water, use your brush and clean all the more stubborn areas. This includes the areas between the spokes as well as where brake dust tends to collect. The brush goes a long way at getting the toughest stuff off. You can also rinse and brush the tires. This quick cleaning will make the area around the rims much cleaner. -
6
Rinse
Now it's time to wash the soap off. I would suggest using the jet setting again and spraying the rims from the top down. If the rims hadn't been cleaned for a while, you might need to repeat Steps 4, 5 and 6 once more. -
7
Drying and Enjoying
When the rims are as clean as you want, it's time to dry them up. Using a clean, low lint cloth, wipe the rims from the outside in. Be sure to change the areas of the towel being used as brake dust behind the rim may still mess it up.
There are several after wash waxes and protecting agents that can be purchased to enhance your cleaning. They can be found at the same places you purchased your cleaning agents.


