How to Create a Photo Calendar Using Shutterfly
Shutterfly is a great online website which allows you to save your pictures online, and you can also turn your images into photo books, cards, gifts and even calendars. There was a time when AOL Pictures announced to close the website and transfer the users to PhotoWorks, after facing tough competition. The same happened to PhotoWorks some time later, and the company transferred all its users to Shutterfly, which dominates the market.
You should also visit Shutterfly, a great platform, which you can use to save your beautiful memories into cards, gifts and different other things. This article will shed light on how you can create a photo calendar using Shutterfly.


Instructions
-
1
Visit Shutterfly.com and you will see a popup window appearing on your screen, asking you to register a new account. Here, you will have to enter your first name, last name, email address and password. Make sure you click the check box before “Yes, I accept the Shutterfly terms and conditions”, before clicking the “Submit” button. As a sign up bonus, you will be allowed to get 50 4x6 prints, without spending any money.
-
2
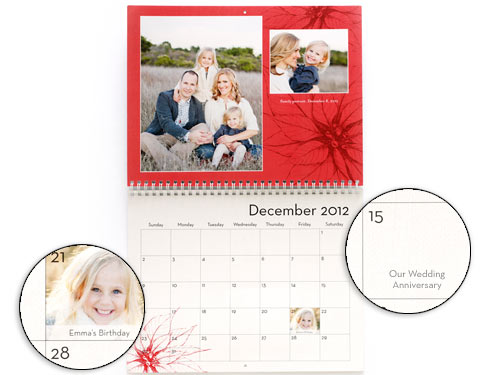
Under “My Projects” section, you need to click the “Calendars” text link. Now select the type of calendar you want to create. You can choose from wall calendars, desk calendars and calendar posters.
After selecting the type of calendar, define the number of months you want to appear on the calendar, if you are creating wall or desk calendar.
For calendar posters, you will have to select the size of the poster. Also, you need to select the starting month for the calendar and then click the “Make a Calendar” button. -
3
Select a style for your calendar, and click the “Next” button. Now you can add text to the allowed fields, and drag and drop pictures from your albums. You can change the layout of the calendar, by changing the number of pictures you want on your calendar, and their orientation. There is also an option of changing the background of the calendar, by clicking the “Backgrounds” tab.
-
4
After you are done with setting up the layout and the background of the calendar, click “Next” and then press “Yes” if a popup window appears, saying “You have unsaved changes in your project. Do you want to save?”
Click the “Save” button and then the “Order” button. Provide your billing information, along with your postal address, to complete your order for your customised calendar.


