How to Create a Timelapse Video
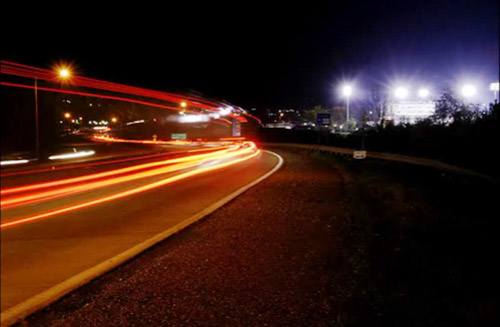
Timelapse is a photography technique that involves the camera sensor being exposed to light for a longer duration of time than usual. This is mostly done when there’s either no light or very less light because the continuous exposure of light to the sensor allows it to capture a great amount of it to enlighten the subject. Timelapse is often known as the moving light or light painting, which is more of a fascination for general audience and a challenging work for the professionals.


Instructions
-
1
Selecting the location or the angle to shoot the video is an important task. You cannot change the angle throughout the video so it’s crucial that you try and select the best possible location for shooting the time lapse. Whether you’re trying to look for a higher elevated angle or trying to select a wide-frame angle, the choice is entirely yours. But in doing so, you must ensure that it’s the best possible that you could capture. Moreover, try to set-up at such a location that no one can disturb your shot once the shooting starts. You really don’t want to miss a wonderful shot just because you didn’t do your homework right.
-
2
Make sure that you have all the necessary equipment with you once you head out for shooting a time lapse. You need to have all kinds of lenses that you could possibly use. Furthermore, a tripod stand is the most important thing that you need after the camera to shoot a time lapse.
-
3
Take a test shot before you decide to shoot. Test shoot would help you get a demo version of your final result. This also helps in deciding how much exposure and shutter you should keep before you shoot.
-
4
Adjust the camera settings once you’ve taken your first test shot. There might be certain things that you need to change including exposure, shutter or aperture. Moreover, also turn off your auto white balance, instead set the one that matches the situation.
-
5
Take another test shot after adjusting your settings. This is to make sure that you haven’t left any loose ends prior shooting the final version. It’s important to take several test shots before you decide to shoot the final time lapse.
-
6
Start taking shots after a fixed duration of time. Whether it maybe 0.1, 1 or 5 seconds, varying per your preference. Make sure that the shots you take should be shot after a constant interval of time. Use a c for better results.
-
7
Hook these shots up together. You can use any video software you that, common choices include Sony Vegas, Adobe Premiere and Final Cut X Pro. Compile the shots using the software and include some colour correction if you must. Your final presentation is ready to be presented.


