How to Create The Orton Effect Using Photoshop Elements
If you make the images look softer, more painterly and dreamy, then you can say that you have applied Orton effect on them. Applying Orton effect is a technique devised by Michael Orton, a famous photographer. Almost every image editing software program contains the Orton effect, and Adobe Photoshop Elements is one of them. This program allows its users to load their favourite images and apply the Orton effect with just one click.
Initially, it appears really difficult to locate the Orton effect option in Adobe Photoshop Elements. However, you will not be having any such issue, as this article will help you in applying the Orton effect.


Instructions
-
1
Launch Adobe Photoshop Elements and go to the “File” menu. Select “Open” and locate the image which you want to use for the Orton effect. The alternate way to open the image in Adobe Photoshop Elements is to go to the folder where you have kept the image.
Right click on the image file and move your cursor over “Open with” option. From the list of options, select Adobe Photoshop Elements, and it will open in the program. -
2
Now you need to locate the “Photography Effects” tab at the right panel in the program. Click on it, and you will see a list of effects appearing in the drop down menu.
Here you will see a sample picture with Orton effect applied on it. You can check the sample picture without the Orton effect by moving your cursor over it. -
3
Now it is time to apply the same effect on your own picture. Just click on the “Add Orton Effect” button, right below the sample picture. At this point, you will not see any change to your picture.
-
4
You will see three sliders under the “Add Orton Effect” button. First you need to use the “Increase Blur” slider, to apply the blur effect on your image. Then you can apply the noise effect by using the slider under “Increase Noise” option. In the end, adjust the brightness of the image.
-
5
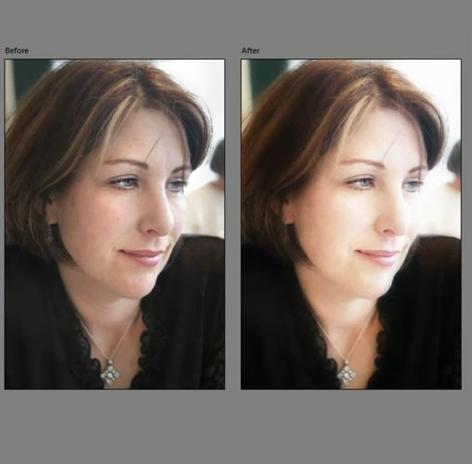
Once you are done with applying the Orton effect, you can compare the edited picture with the one before editing. For this purpose, you will have to click the “View” drop-down menu and select “Before and After – Vertical” option. You will now clearly see a fine improvement in your image.


