How to Fix iPhone Error 23
The iPhone is a unique production of Apple Inc., functioning as a cellular phone. The series of iPhone are lavish as they contain all the latest features. Therefore, seeing an error in your iPhone can be a scary experience for you as you cannot afford any problem with your idolized phone that is near to your heart. However, many times you might need to restore your iPhone in order to fix certain issues with it, which occurs time to time. During restoration of your phone, you can come across some error codes like “iPhone Error 23.” Fortunately, this error is an ordinary iPhone error and does not cause any serious damage. Moreover, the iPhone Error 23 is relatively simple to fix.
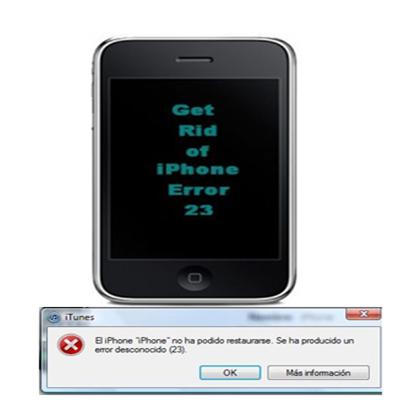
iPhone Error 23 basically shows that your phone was unable to enter into the restore mode and is not functioning properly. In order to fix this error, all you have to do is “manually access the Device Firmware Update (DFU) mode,” right before attempting to restore your iPhone.
Things Required:
– iPhone
– A 30-pin USB connector cable
– Computer


Instructions
-
1
Enter DFU Mode
The very first thing you have to do is, restoring your iPhone in the DFU mode. It means you have to get your iPhone to an interface with the help of iTunes, without iTunes robotically loading the latest version of iOS onto it. Go through the following given below simple instructions in order to enter the DFU Mode:
Simply connect your iPhone to your computer with the help of a 30-pin USB (Universal Serial Bus).
Now, use the “Power” button of your iPhone to switch it off.
Once you power off your iPhone, simply press and hold the “Home Button” and the “Power Button,” all together on your phone for around 10 seconds.
Now, free the power button of your iPhone and carry on pressing its home button (main button) for few more seconds until your computer identifies your iPhone connected to it as a standard USB device.
Now, restore your iPhone like the way you generally do. -
2
Normal iPhone Restore Procedure
Once you restart your iPhone in a DFC mode, simply restore it through the normal procedure which is as described below:
Use a 30-pin USB connector in order to connect your iPhone to your computer.
Now, open the iTunes and just show up your iPhone’s device in the column on the left hand side.
Move on and click the “Summary” link/tab in the main iTunes window.
Hit the “Restore” link and select the “Backup” tab in order to save your music right before the start of the restoration process. All you have to do is, follow the on-screen prompts in order to back up the songs’ collection in your iPhone.
Note: You can click the other available option of “Don’t Backup,” but you will lose your songs collection that you do not yet have saved in your computer.
Now, click the “Restore” tab, allowing the firmware to restart in your iPhone.
Click the “OK” link at the end of the completion of the restoration process.
At this time, you will see the “Setup your iPhone” screen appearing. Make sure not to disconnect your iPhone from the computer until the “Connect to iTunes” message disappear automatically or until you get the “iPhone is activated” message on the screen of your iPhone.
Select the option next the “Restore from the backup of” in the iTunes and choose a phone backup data in order to restore your iPhone’s songs.
Click the “Continue” tab now to complete the process successfully.
 mode,” right before attempting to restore your iPhone.
Things Required:
- iPhone
- A 30-pin USB connector cable
- ComputerNext%20stop%3A%20Pinterest "Pin It")


