How to Install a Grab Bar
Grab are wise tools in the washroom that prevent any fall by allowing you to grab them. They are usually installed near the tub and shower when the floor is slippery and there are chances of slipping. A well placed grab bar can make your washroom a much safer place. Grab bars are readily available at hardware and home improvement stores and can be installed very easily. This guide has the detailed process of installing a grab bar in your washroom, right from the materials needed to the finishing up.
Things required:
– Electronic stud finder
– Reversible drill
– Carbide drill bit
– Silicon caulk
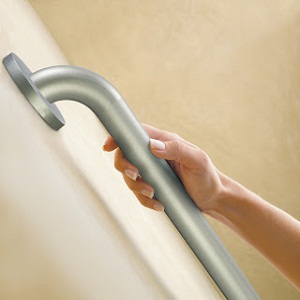
– Grab bars
– Stainless steel screws
– Fine tip marker


Instructions
-
1
Determine location:
While you use the washroom, determine the locations where you want a grab bar to help you. Ask others around the house. Decide on whether you want a horizontal grab bar, a vertical one or install it in a specific angle. A grab bar can be placed to help you near the tub, shower, sink and toilet. It depends on your personal needs.
-
2
Locate studs:
Use an electronic stud locator to locate the studs behind the wall material. Confirm the stud by drilling a small hole into the wall. The second stud will be at a distance of sixteen inches from the first one. Mark these with a pencil.
-
3
Position grab bar:
Once you have found the studs, position your grab bar over these stud marks. The flanges which are the ends of the grab bar must be placed over the stud marks. Drill the mounting screws into the bathroom tiles to install your grab bar. To drill holes over the bathroom tiles, use a carbide drill bit. It is better to make a very small pilot hole and than build up on it to prevent the tile from cracking. This starting hole also gives the screws a hold.
Test your grab bar by giving it a solid yank.


