How to Install Polystyrene Molding
Molding can be used as a decorative feature in a room as you have a large variety in colors and designs to choose from. It can also be sued to protect the walls from furniture marks like chairs. Polystyrene molding is a good alternative to wood as it is more water resistant and very economical. Its installation is an easy process which every home owner can perform. Take our your tool box from the garage, buy polystyrene molding from the hardware store and get working with our step by step by step guide below which makes everything so much easier for you.
Things required:
– Tape measure
– Primer
– Paint
– Paint brushes
– Miter saw
– Pencil
– Construction adhesive
– Caulking gun
– Painter’s tape
– Painter’s caulk


Instructions
-
1
Measurement:
Measure the area you want to cover with molding. Measure the length and width using your tape measure. Get molding according to these measurements. However, do make allowances for any wastage or careless cutting and get extra length. You can apply molding to where you ceiling meets the wall or where the wall meets the floor or any surface like cupboards etc.
-
2
Prepare molding:
Apply primer to the molding. Let the first coat dry. Apply another one and let it dry thoroughly. When the primer is all dry, apply a coat of finish pant and wait for it to dry.
Use the Miter saw to cut the one corner of the molding at an angle of 45 degree and the other totally straight to get the perfect alignment. The mitted side will fit well in corners.
Apply construction adhesive to the back surface of the molding using the caulking gun and spread it around.
-
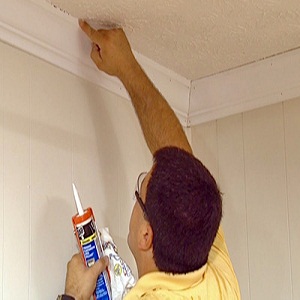
3
Install molding:
Hold the molding to the surface you want to install. To keep it in place before the adhesive works, use the painter's tape. Use the caulk gun to apply adhesive around the edges so that the molding sticks well to the surface. Use your fingers to neatly fit in any gaps.
After the molding has set in, finish up with light painting the area so that there are no glitches.


