How to Install WordPress on a Web Server
If you are planning to start your new blog, then nothing can be better than to choose WordPress for your new project. WordPress is currently one of the best options available these days to set up new blogs, as it is really easy to install and manage. You can install it on almost any server and as soon as you start writing for your blog, you will start getting traffic on it.
So, what are you waiting for?
Just set it up on a web server and start posting your experiences and things of your interest.


Instructions
-
1
Visit WordPress and download the latest version of the codex available. If you are using Linux, then you should download the codex in .tar.gz format. On the other hand, if you are using Microsoft Windows, then you will have to download in .zip format.
-
2
Now you need to create a MySQL database on your web server and create a user with all the administrative privileges. It is really essential to have a user with all the privileges, in order to install the WordPress successfully.
-
3
For your WordPress installation, you can create a new directory under your public HTML file, and name it as per your choice. However, it is recommended that you should name it as WP1 or something similar to it, so that you can remember it later.
-
4
You can now unzip the codex which you downloaded in the first step, and keep it saved on your local hard drive. Now go to your WP1 directory and upload all the file structure of the codex. Select all the folders and sеt the pеrmissions from WP1 down to wp1 down to (chmod 755 wp1).
-
5
Locate the “wp-config-sample.php” file and rename it to “wp-config.php”. Open it and enter the user information that you created in the second step, along with the MySQL database.
-
6
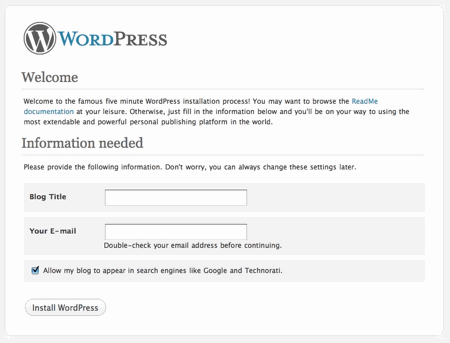
Once you completely add your MySQL database and user information to the wp-config.php file, open a new browser window and write “http://www.yourwebsite.com/wp1/wp-admin/install.php” in the address bar. Hit “Enter” key and your WordPress installation will begin.
-
7
Follow the onscreen prompts and provide your login and database information when asked. After the completion of the installation, you can login to your WordPress account and start managing its fonts, colours, page layouts, and other settings, as per your needs.


