How to Insulate Your Garden Shed
The technique followed in insulating an outdoor garden shed is pretty similar to the method used for insulating the exterior walls of the house. There are a number of advantages of insulating a shed such as, better wintering conditions for plant feed, and for protecting the garden equipment, which is prone to rust and corrosion. A properly insulated shed also keeps the place warm and comfortable in winters.
Things Required
– Batts (kraft paper batts)
– A copy of local building code
– Measuring tape
– Plywood
– Utility Knife
– Goggles
– Pliers
– A set of saws
– Breathing mask
– Staple gun


Instructions
-
1
Decide on the choice of insulating material you wish to use in your shed. There are many different solutions for insulating a garden shed. One of the easiest and cost effective way is to install fibre glass. It is recommended to purchase easy to install fibre glass batts for your shed.
-
2
Check the local building codes for shed insulation before proceeding, as different regions have different limits on vapour insulation on outdoor structure like sheds. Remove drywall or any other type of paneling installed on the walls inside the shed. Identify the distance between the two channels between the wall studs with the help of a measuring tape.
-
3
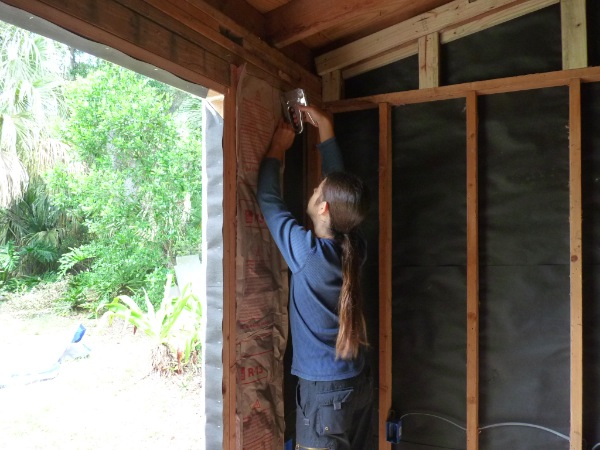
Use kraft paper batts to insulate the building from outside, use a hammer gun to fix it permanently with the walls. Also measure the cavities between the walls and ceilings, as batts come in different variations for different cavity sizes. Calculate the total square feet of fibre glass that you will required for the walls and ceilings.
-
4
Select the right batt type for the walls and ceilings. R-11 or R-19 batts are preferred for walls while R-25 or R-30 Batts are used for insulating the ceilings. The batts should be chosen carefully, so that they are an inch less wide than the cavities.
-
5
Measure the exact length and cut of the batts for their size. Remember, do not fold or place them in an area where they do not fit. It is recommended to place the batt on a wooden board, preferably plywood, as it offers a cheap and expendable cutting surface. Wear your protective goggles and don your working clothes. Install the batts on the walls and ceilings after cutting them in pieces. If you cut them up exactly they should fit nice and easy on their respective spots.

- A copy of local building code
- Measuring tape
- Plywood
- Utility Knife
- Goggles
- Pliers
- A set of saws
- Breathing mask
- Staple gunNext%20stop%3A%20Pinterest "Pin It")
