How to Iron a Skirt with Pleats
It may seem quite difficult to iron a skirt with pleats, but the fact is that it is very similar to ironing any other garment. As is the case with all garments, the time required to iron a pleated skirt would be mainly dependant on the size of the skirt and your garment ironing skills.
Things Required:
– Ironing board
– Pleated skirt
– Pants hanger with clips
– Straight pins, if necessary


Instructions
-
1
Preheat the iron you will be using to the desired temperature, which would depend on the fabric that was used to manufacture the skirt. Make sure that the iron is not too hot by testing it on an inconspicuous section of the skirt.
-
2
Position the skirt on the ironing board in such a way that the skirt’s waist is right at its narrow end. Start with the waistband and iron all the way down to the point where the pleats start. Rotate the skirt until you have completed a full circle. The waistband would now be facing the broad end of the ironing board.
-
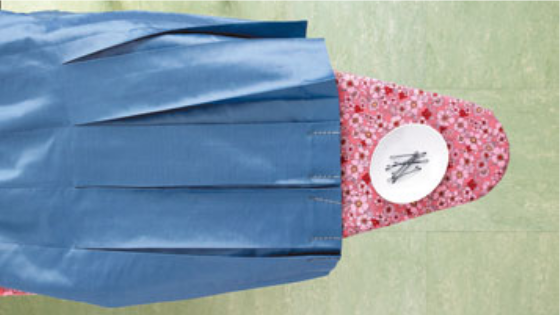
3
Stretch the pleats, one at a time, with your hands. Make sure that the fabric is flat against the ironing board. If there are too many curls in the pleats, you would not be able to keep them straight. In such a situation, use straight pins to secure the pleats, one at a time, to the ironing board.
-
4
You would have to iron one pleat at a time. Start at the skirt’s hemline and iron all the way up until you reach the waistband. There is no need to iron the waistband with each pleat you iron, so stop ironing upon reaching the waistband and move on to the next pleat.
-
5
Shoot a burst of steam from the iron onto the skirt by raising the iron only a few inches. Allow enough time for the first pleat to cool down before you start ironing the next pleat. This will keep the ironed pleat from getting re-wrinkled. Continue in this manner until all of the pleats have been ironed.
-
6
Use pants hanger with clips to hang the ironed skirt by the waistline. Before you wear the skirt, allow it to dry out in open air.


