How To Make 3D Pumpkins
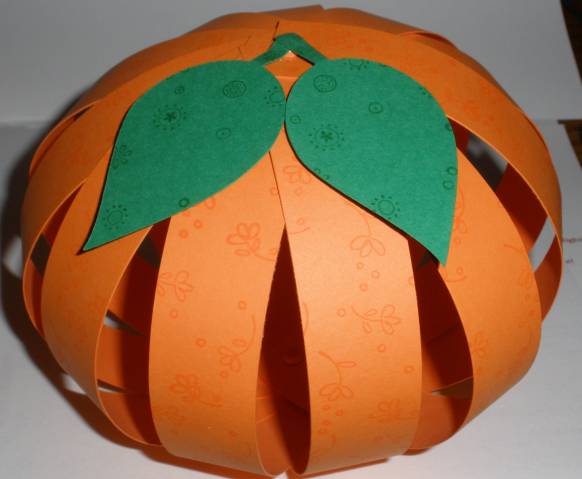
Crafting a 3-D for special occasions such as Halloween decoration etc is a lasting experience. This lasts much longer than the original pumpkin variety. Also, you have the advantage of customizing your 3-D pumpkins by using paper of different colours and shades. It is in your complete control to apply cuts to your pumpkins of the sizes you want. For example, you can make the cuts smaller or larger or cutting them in different shapes altogether. Further since these pumpkins are light in weight you can put them at different places. You can even hang them with ceiling, a tree or another place you find more suitable for the pumpkin display. It is entirely up to you how you plan to apply the design cuts, how you chose colour scheme and how you display 3-D pumpkin once it is ready for display.


Instructions
-
1
Cutting of Circles
From your orange card stock, select the piece you want to use for making the 3-D pumpkins. After you are done with selection of the paper, cut at least eight pieces of the paper. Maximum size of each piece should be five inch but even if it is a bit larger or smaller, make sure all pieces have the same size. -
2
Folding of Circles
After you have eight five-inch paper pieces ready, hold a folded circle. It should be in a way that you look at the folded edge. Apply the hot glue along the fold, and then a green chenille stem against the glue. You have to attach a second folded circle then to the stem using glue on opposite side of the stem. This is the most delicate part of your project of making 3-D pumpkin, but with concentration you can perform it easily. -
3
Folding of Other Circles
After you are done with folding two edge of two circles, apply third and fourth and then rest of circles in the same way. You will have to affix folded edge of each circle to the opposite side of the stem that a 'X' shape is created. This is the base of your pumpkin. -
4
Trimming of Chenille and Adding Ribbon
After you have glued folded orange paper pieces, you might need to trim chenille stem, especially if it is sticking out of the pumpkin larger than you expect it to be. Trim it the size you want to, and then curl green ribbon around it. For this you will need to cut at least two pieces of green ribbon, of about 6 inches each. You can curl the ribbon by sliding the sharp edge of one of the blades. Apply hot glue on one end of the ribbon to the chenille stem so that the curl dangle over the pumpkin. You should curl the second piece of the ribbon in similar manner, and your 3-D pumpkins is ready to be hanged at the place you want to or think that it will look better at that place.


