How to Make a Balloon Powered Car
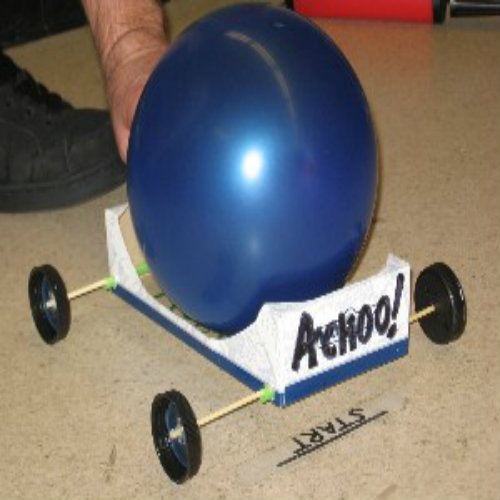
Being a middle school student, if you are searching for ideas for a Science project then it is always good to go for something unique and simple. Having said so, a balloon powered car is the best option considering it is simple to make in quick time and there is minimum expense involved. The phenomenon behind balloon powered cars is the concept of action and reaction forces. An air filled balloon is actually fixed or taped over a cardboard that is supported by wheels. When the neck of the balloon is released, this makes the car go forward along with the motion of the balloon. Hence the movement of the car, along with the balloon, is a reaction to the air that is moving out of the balloon’s neck in the opposite direction. This car can be made in quick time without anyone’s assistance or supervision, provided the below given items are available.


Instructions
-
1
Things Required:
- A regular Birthday Balloon
- Empty cereal box or a piece of cardboard
- Four Bottle Caps
- Scissor
- Two thick wooden straws
- One plastic straw
- Scotch tape
- Glue -
2
Making body of the Car
First of all, cut the sides of your cereal box that are facing up with the help of scissors. Ensure that it is done neatly to avoid imbalances in the car's movement.

-
3
Drilling holes for wheels
With the help of something sharp, make four holes in the cereal box such that two holes are on each side and are at equal distance from each other. -
4
Putting wooden straws in hole
Put the straw in a hole at one side and slide it out through a hole on the other side. Repeat the same for the other two holes by sliding a straw thorough them. -
5
Fixing the Wheels
Using glue, attach the four bottle caps one by one to the tip of the straw ends such that the straw is exactly on the center of the bottle cap. -
6
Filling the Balloon
Insert a straw in the empty balloon and put scotch tape around it. Now blow the balloon and set it in the middle of the box by taping it down. Make sure that the opening of the straw is kept closed and is on the back of the car.

-
7
Releasing the Balloon
Finally, as you release the straw, it will allow the air to pass out of the balloon and the car will move in the opposite direction of the escaping air.


