How to Make a Pebble Picture Frame
In addition to dotting the beach and paving cobblestone walks, pebbles also make great objects with which to create a picture frame. Your favourite picture, lined with a rustic pebble frame, is bound to liven up the decor in any room.
Things Required:
– Picture frame/scrap wood
– Sandpaper
– Sand
– Small pebbles
– Contact cement
– Spray craft glue


Instructions
-
1
Firstly, begin by gathering the pebbles you want to use to make your picture frame – make sure they are smooth, round, and look pretty. For this purpose it is best to look for pebbles at certain spots – don’t just go walking up and down your street picking up the pebbles you find. The beach, or a river or lake, is an ideal spot to hunt for pebbles, as the stones here are smooth, frequently washed by the water, and tend to look better and more natural. Wash all your pebbles once you have collected them, and leave them out in the sun to dry completely.
Image courtesy: bbc.co.uk
-
2
Once you have prepared your pebbles, it is time to work on your frame. For this purpose you can use a ready-made picture frame – just make sure it is a plain one with an even surface, and take out the back and the glass covering, to leave just the skeleton of the picture frame to work with. Otherwise, you can just build a new frame to your liking with some scrap wood. Whichever option you choose, start by sanding the surface of the frame with sandpaper – this will make it rough, and help the sand, pebbles, and glue to stick to it better.
-
3
Now, spread out some newspaper on a flat working surface, and lay your frame on this. Proceed to spray on the spray craft glue all over the frame, and sprinkle it with an even layer of sand. In addition to the front of the frame, the top and side edges need to be covered in glue and sand too. Allow this coating of sand to dry for around 20 minutes, then repeat the process, spraying on glue and sprinkling on more sand. Then, let this second coat dry for around half an hour to 45 minutes.
-
4
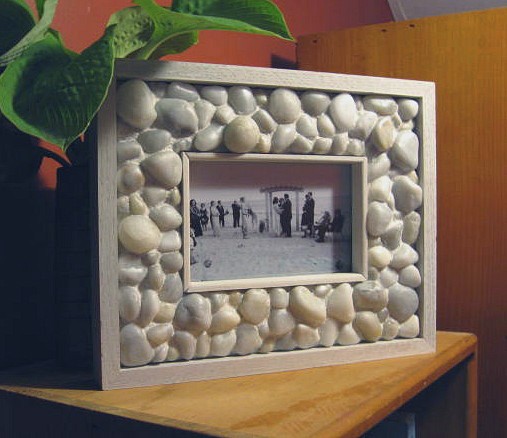
Once the sand coating has dried, it is time to attach your pebbles to the frame. Use contact cement for this purpose – regular slow drying craft glues will not help the pebbles stick, so you need something strong that works fast. Customise your frame – you can glue the pebbles on in swirling designs, or cover just half the frame with pebbles, etc.
-
5
After you’ve glued them all on, put the frame aside to dry and set for around half an hour. Once this time period has elapsed, you can hold the frame upright, attach the back to it, and slip in a picture. Place the frame on your mantelpiece, or any other location you like.
Image courtesy: handmadespark.com


