How to Make an Herb Window Box
Having fresh herbs close by that you can pluck as and when you need them in the kitchen is a huge advantage. In addition to enhancing the flavour of food with the freshest herbs possible, it is also great to have these fragrant plants nearby as a refreshing and visually pleasing cluster of green. The best way to keep herbs near the kitchen is to make an herb window box – this can be fixed right outside your kitchen window, and every time you need a sprig, you can simply reach out and pick as much as you need.
Things Required:
– Herbs for planting
– Window Box
– Drill
– Clay pot shards
– Soil

Instructions
-
1
To begin, choose herbs that do not need excessive dept of soil, and have shallow root systems – these are the only herbs your window box can cater to. Plants like basil, sage, oregano, parsley, and chives are great for planting in window boxes.
-
2
While selecting the herbs, you will also need to make sure you pick the ones that you use most in your cooking. Assess your culinary style, and the dishes your family is most fond of. You can also take a look at old shopping lists, to determine which herb you buy the most.
-
3
Once you have drawn up a list of the herbs you plan to plant in your window box, visit your nearest nursery or gardening store, to look for plants that have already been started. If you chose common enough varieties of herbs, you are likely to find them easily. If the herb is rarer, or more obscure, however, you will need to hunt around in gardening stores, until you find what you are looking for.
-
4
After purchasing the herbs, it is time to get a window box. Before you go shopping for one of these, make sure you measure the area below your kitchen window, to determine the exact length, width, and depth of the window box you will need. Once you know the specifications of the type of window box you require, you can easily purchase one from a local home and garden store. Make sure you buy one with brackets, so it can be propped up and supported on the wall.
-
5
Once you have bought all the things you need, proceed to work on installing the window box. Turn it upside down, and drill three to four holes in the bottom (these should be around ½ inch in diameter), to allow for proper drainage. Stick shards of old clay pots into each of these holes, so the soil does not pour out along with the water. Then, install the brackets that came with the box, and prop the box up on this, directly below your window.
-
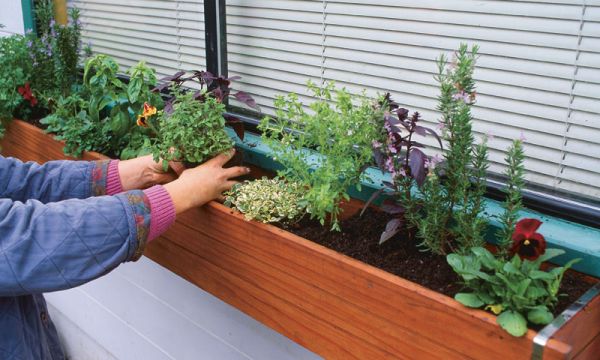
6
Finally, plant in the herbs you bought. Turn the pots over to turn out the plants, taking care not to damage their root systems, and retain most of the original soil. Transfer them all to the box, and once they are all in, fill in any remaining space with more soil. Once the box is filled to the top, water it well. Your herb window box is now ready.
