How to Make Rainbow Inspired Body Butter
Body butter is a creamy texture used to moisturize and protect your skin, especially during the dry winter months. Consistent use of body butter makes your skin soft, supple and less prone to cracking. You can easily find body butter at the nearest cosmetic or drug store, but making one at home is also a fun. You can make a plain body butter or add different colours to it to make it a rainbow inspired moisturizer.
Things Required:
– 1 1/3 Cup Shea Butter or any butter base of your choice
– 1/2 Cup Carrier Oil (Sweet almond oil or olive oil)
– 1 Teaspoon Vitamin E Oil
– 1/2-1 Teaspoon Essential Oil or Body Safe Fragrance Oil (optional for fragrance)
– 1-2 Teaspoon of Water Soluble Colorant or Soap colour (optional)
– Whisk or electric mixer
– Mixing bowl
– Pot or Pyrex glass cup to melt butter
– Pot to boil water
– Spoon
– Stove
– Measuring cups and spoons
– Container to store the body butter and store in a cool place


Instructions
-
1
Measure 1 and 1/3 cup of Shea butter or any other butter of your choice, using standard size measuring cups.
-
2
Pour the measured Shea butter into a Pyrex glass.
-
3
Place the Pyrex glass in a cooking cup and melt the butter on medium-high heat. Placing the pyrex glass into a cooking cup will keep your butter from burning during the melting process.
-
4
Once the shea butter has melted completely, transfer it to a medium size mixing bowl and allow it to cool for 10 to 15 minutes.
-
5
Add ½ cup of carrier oil (sweet almond oil or olive oil) to the melted butter.
-
6
Also add 1 teaspoon of Vitamin E oil into the butter and carrier oil mixture and mix it thoroughly. Vitamin E oil will serve as a natural preservative to extend the shelf life of your body butter. It can be easily found at the nearest drugstore.
-
7
Add one to two teaspoons of your favourite essential oil to the mixture. This step is optional and you can skip if you want to make an unscented variety.
-
8
Thoroughly mix the ingredients using a whisker or an electric beater.
-
9
After beating the mixture for two minutes, wait for a while and allow the concoction to solidify a little.
-
10
Once the mixture starts solidifying, place it in the freezer and allow it to cool for 15 to 20 minutes.
-
11
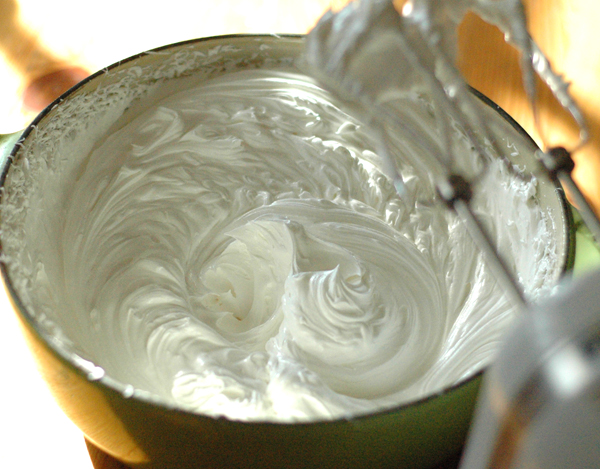
Bring the mixture out of the freezer and whisk it again until it starts forming peaks on the whisker.
-
12
Now separate the mixtures into portions and place it into various small bowls.
-
13
Add half to one teaspoon colour to each bowl and whisk it using a hand whisker.
-
14
Now scoop the different coloured mixtures into the container making layers of your preference.

- 1 Teaspoon Vitamin E Oil
- 1/2-1 Teaspoon Essential Oil or Body Safe Fragrance Oil (optional for fragrance)
- 1-2 Teaspoon of Water Soluble Colorant or Soap colour (optional)
- Whisk or electric mixer
- Mixing bowl
- Pot or Pyrex glass cup to melt butter
- Pot to boil water
- Spoon
- Stove
- Measuring cups and spoons
- Container to store the body butter and store in a cool placeNext%20stop%3A%20Pinterest "Pin It")


