How to Make Your Digital Photos Look Better
Not everyone is skilful when it comes to using a digital camera effectively to take a great shot. There are so many factors to consider while taking a shot, which is something that only professional and trained photographers seem to have a grasp on.
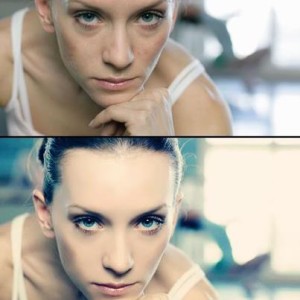
With so many technicalities involved in digital photographs, the amateur photographers have begun to use photo editing programmes to make a decent digital photo look great. Photo editing programmes allow users to change the contrast, brightness, sharpness, colour balance and various other aspects of the photo. The programme is so useful that even professional photographers commonly use it.


Instructions
-
1
The first thing that you need to do is to install a photo editing programme on your computer. There are a number of really good programmes available on the Internet and in computer shops. Most people turn to Adobe Photoshop for their photo editing needs, as the programme is pretty simple to use for amateurs and at the same time offers a great degree of freedom for advanced photo editors to make adjustments to the photo. You can download the programme from the official website of Adobe and then purchase the digital key through online payment. Alternatively, you can visit your nearest computer soft and get the programme on DVD. The installation process of Adobe Photoshop is simple to understand, though there are certain requirements that your computer should meet. Make sure you get your hands on the latest version of the programme.
-
2
Once you have installed a photo editing programme such as Adobe Photoshop on your computer, connect your digital camera with the computer through a USB cable and shift the photos to your hard disk.
-
3
Launch your photo editing software and then open the digital photo that you want to edit. It is best to make a backup copy of the image that you are about to edit, so that you do not accidently end up replacing it with the edited one.
-
4
Next, proceed to fixing the colour balance. Majority of the old digital cameras do not properly calculate the white balance during the shot, which results in the photo turning out too red or blue. However, you can correct this by clicking “Image,””Adjustment,” and then “Colour balance” in the menu tab. This will open up a small panel with sliders on it. Move the different sliders to the left or right until you are satisfied with the difference.
-
5
Another thing that some cameras are not capable of properly capturing or producing is the contrast, primarily due to the weak or low quality lens. Again, you can make the required adjustments for this by using your photo editing programme. Click “Image,” “Adjustment” and then “Contrast level” to open a panel with two sliders on them, one of which controls the brightness, while the other controls contrast. Change the sliders for the desired result.
-
6
Save the image after you are done making the changes. Remember to save the image by a different name than the original.


