How to Run a Bead of Weld
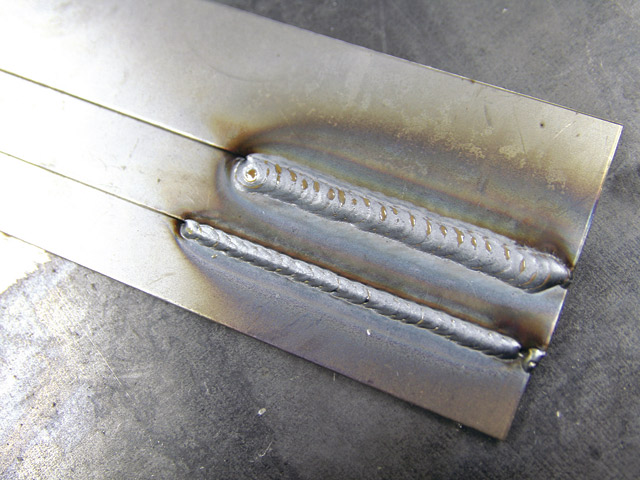
If you are planning to take on a welding project, you might want to know the right technique of running a bead of weld. It is something that requires time, patience and a fair amount of practice to master. There are a number of factors that affect the quality of a bead of weld such as the distance between welding electrode and base metal, angle between the electrode holder, the metal surface and the way you strike the arc.
Things Required:
– Electrode holder
– Welding electrode
– Heavy, leather welding gloves
– Heavy leather welding apron or jacket
– Welding helmet
– Fire resistant cap (optional)


Instructions
-
1
Grasp the electrode holder with both your hands. Keep the grip strong, yet comfortable, to effectively control the length of the arc while welding.
Wrap your hands around the electrode holder’s grip. Make sure that your thumbs are crossing and are pointed towards the welding electrode’s tip while you are carrying the electrode holder. -
2
Strike your arc in a manner similar to striking a match. While the electrode is held at an angle with respect to the base metal, strike it against the metal at a point farther from the actual welding point.
-
3
When the arc has been struck, bring back the welding electrode. To obtain the proper arc length, you would need to maintain optimum distance between the welding electrode and the base metal.
-
4
Hold the electrode holder at such an angle that tip of the welding electrode and the base metal are at an angle of 45 degrees to each other. With constant practice and improvement in your welding skills, you would be able to safely increase this angle to 95 degrees.
-
5
After you have struck the arc, follow a straight line to run the bead of weld. When you have mastered the art, you would be able to run the bead of weld in circular to crescent shapes very easily.
Next%20stop%3A%20Pinterest "Pin It")


