How to Setup MySQL Database on Lunar pages
MySQL is world’s most used database management system. It gained popularity mainly because of open source PHP and Ruby on rails applications. Since a huge number of individual and small businesses use MySQL, almost every other hosting service provider offers a specific number of MySQL databases. Lunarpages offers virtually unlimited MySQL databases to its users. If you opt for cPanel hosting with Lunarpages, creating database will be almost similar to that of other hostings, but in case if you have LPCP (Lunarpages Control Panel), creating and setting up a database on Lunarpages is little different from other hosting services.
This guide will help you locating appropriate functions in cPanel and LPCP for creating MySQL database and users on Lunarpages .


Instructions
-
1
Open lunarpages.com/login.php or http://www.yourdomain.com:2082 (replace yourdomain with your website) and login to the control panel using username and password.
-
2

-
3

-
4

-
5
Now it will require you to create a database user. Add a user and enter password twice, then press ‘Create User’.

-
6
Now you’ll be taken to a page where you need to assign rights to the user. Check ‘All Preveliges’ and click on ‘Next Step’. Your database and user are ready!

-
7
Create Database and user using ‘MySQL® Databases’ option in Lunarpages control panel:
You can also create database using this option. Click on ‘MySQL® Databases’ and it will show you all current databases along with an option to create a new one. Click on ‘Create a MySQL Database’ and it follow the steps as above.

-
8
Create Database Using LPCP:
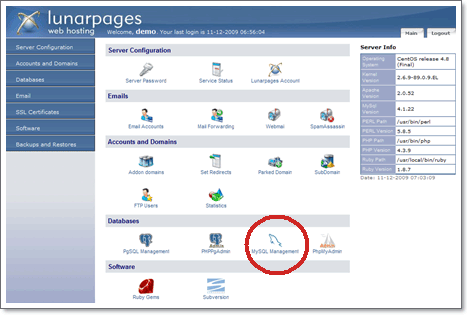
In case if you didn’t opt for Cpanel hosting of Lunarpages due to any reason, you may not find the above two methods for creating database. In that case you’ll need to create database using ‘MySQL Manager’ which is found under 'Databases' section in LPCP. Click on it and follow the steps which will include adding database name, adding a user and assigning rights to the user.

, creating and setting up a database on Lunarpages is little different from other hosting services.
This guide will help you locating appropriate functions in cPanel and LPCP for creating MySQL database and users on Lunarpages .Next%20stop%3A%20Pinterest "Pin It")