How to Solder Copper Pipes and Fittings
Soldering copper pipes are a skill necessary if you plan to do any plumbing repairs around your home. If done properly you will save expensive plumber bills, however if you are not comfortable using a propane torch you may want to hire a plumber for your own safety and prevent more damage to your home. As for the method, make sure to get the pipes clean and hot and work quickly as not to let things cool before you are done applying the solder.
Recommended tools:
coil spring tubing bender
wire brush
flux brush
tubing cutter
propane torch
adjustable wrenches
Materials needed:
fine pipe joint compound
self-cleaning soldering paste (flux)
lead-free solder
compression fitting
emery cloth


Instructions
-
1
Clean the end of each pipe bite standing with a piece of emery cloth. The ends must be free of dirt and grease to ensure that the solder forms a good seal.
-
2
Clean the inside of each fitting by scoring with a wire brush or emery cloth.
-
3
Apply a thin layer of soldering paste (flux) to the end of each pipe, using flux brush. Soldering paste should cover about 1“of the pipe end.
-
4
Assemble each joint by inserting the pipe fitting so it is tight against the bottom of the fitting sockets. Twist each fitting slightly to spread the soldering paste.
-
5
Prepare the wire solder by unwinding 8” to 10” of wire from the spool. Then the first 2 inches of the wire to a 90° angle.
-
6
Like the propane torch by opening the valve and striking a spark lighter or match next to the torch nozzle until the gas ignites.
-
7
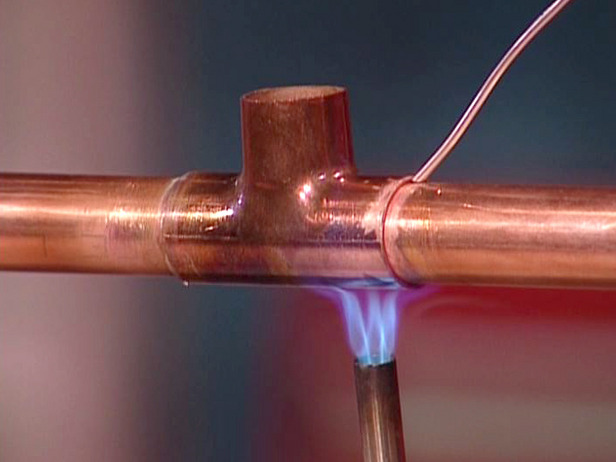
Adjusted the torch valve until the inner portion of the flame is 1 to 2 inches long.
-
8
Hold the flame tip against the middle of the fitting for 4 to 5 seconds, Intel soldering paste begins to sizzle.
-
9
Heat the other side of the copper fitting to ensure that the heat is distributed evenly. Torch the solder to the pipe. If the solder melts, the pipe is ready to be soldered.
-
10
When the pipe is hot enough to melt the solder, remove the torch and quickly push 1/2 to 3/4 inch of solder into each joint. Capillary action feels the joint with liquid solder. A correctly solder joints should show with a thin bead of solder around the lip of the fitting.
-
11
When all the joints have cooled, turn on the water and check for leaks. If the joint leaks, drain the pipes apply additional soldering paste to the rim of the joint, and re-solder.

lead-free solder
compression fitting
emery clothNext%20stop%3A%20Pinterest "Pin It")


