How to Tune your Violin
Anyone who has ever listened to the lovely soothing sound created by violin cannot possibly suppress the desire for playing this remarkable instrument. Although there are many other musical instruments like flute, harmonica, Mandolin and guitar that create some fascinating sounds but when compared with the sound created by violin there is hardly a match. Before you go on to learn about playing violin, you have to first learn about tuning it. Irrespective of the fact that how good you are able to play the violin, if you do not know about tuning it, the sound created may be a weird one. However, you need to be informed that violin is the hardest instrument to tune.


Instructions
-
1
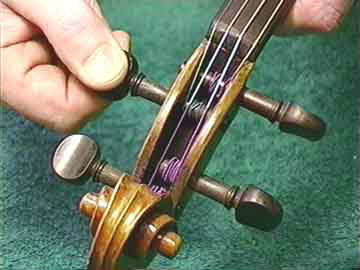
Although violin strings need to be strung tightly but over tightening may result in breakage of the string thus damaging the violin so it is advised to move the pegs very slowly.

-
2
It is good to buy a proper tuner that can make sounds for all four strings which are E, A, D and G. It is good if your violin is equipped with fine tuners at the bottom.

-
3
If you want to make your violin sound higher, turn the particular peg away from you by tightening the string and increasing vibration frequency. Besides, for a lower pitch you have to turn the peg towards you.

-
4
As you start tuning, begin by tuning the string A followed by D, G, and finally E, hearing the sound after tuning each peg. You may use a piano if available to match the sound created by your string.

-
5
After you are done with tuning in the order A, D, G and E, go back to A again and check the sound as after tuning other strings there may be change in the sound of the A string a little bit.

-
6
Now listen to the interval between the A and D strings, followed by interval between the D and G, and finally the interval between the A and E. If all three intervals are correct, the violin is tuned properly.


