Tips to Remove a Wheel Stud
The safety of a car is the foremost thing that one looks for as on it depends the survival of the whole family, due to the extensive use of cars in the modern era. Regular inspection of the wheels and in specification, the wheel stud replacement is one thing that the owner of the car must look forward to in order to ensure that the car stays safe for travelling and for the well being of the whole family. If a wheel stud in a car is broken, damaged or weak, it definitely affects the safety of the car and also has an effect on the other pieces of the car. It certainly compromises upon the safety factor, which is so important these days. It is a simple enough procedure; if you want to do the wheels stud replacement or removal on your own.


Instructions
-
1
Firstly you will have to start with the necessary required materials, in this case the things that would help you dismount the wheel from the car and the materials will also give you access to the other parts of the car. Choosing the wrong type of weapons to access the car may damage other components of the vehicle and can also risk a person’s safety.
-
2
Now you will have to jack up the car. Floor jacks and stand jacks both can be used and the car has to be lifted from the ground to remove the wheel from its assembly. This will make replacement and fastening of the wheel studs very easy.
-
3
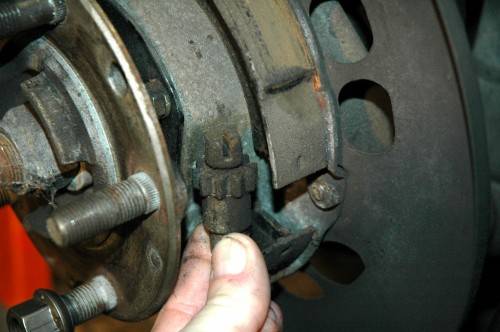
Now you will look to access the wheel stud as it is a very tricky procedure and it depends upon the wheel assembly. Just simply locate the caliper and the rotor as these will easily lead you to the wheel stud.
-
4
Next you will have to take care of the threads. Whether replacing or removing or maintaining, you will have to make sure that you are protecting its threads.
-
5
Now is the time when you are required to remove the old stud and clean it. Firstly it is a complicated procedure as often there is little room to remove the wheel stud. In this sort of case, rotate the wheel back and forth and it will dismantle. Now use a brake parts cleaner and a lint-free cloth to clean the thread and orifice. Also look to dislodge any debris that has been accumulated over the passage of time.
-
6
After cleaning, you are now left with the simple task of inserting the wheel stud back in its place. Use bolts and fasten them with wrenches. You will have to make sure that the screws are tight enough as it is mandatory for a safe drive. Position the wheel back in its assembly and the process has been completed.


