How to Build a Round Pen
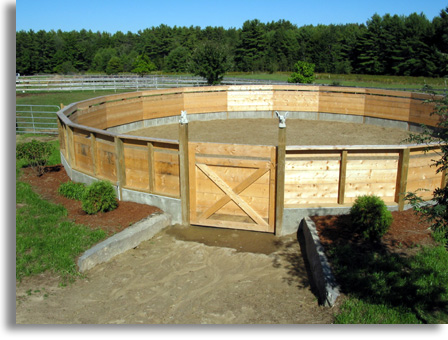
A round pen helps in training a horse in a more efficient and effective way. The horses feel safe and become friendly with their master in the round pen. You can maintain your round pen with metal panels or wood. All you need is a free space, a little time and few tools and equipments.
Things required:

Instructions
-
1
First, you have to select the right for building the round pen for horse training. The area must be levelled and dry. Then, take all the necessary measurements with the help of a steel tape and note them down. It is very important for you to take all the measurements very carefully. It will be better for you to verify all the measurements at least twice so as to avoid any kind of inconvenience afterwards.
-
2
Now, you have to soften the ground for making the round corral. You can start the process by adding up a layer of gravel on the ground. After adding up the gravel, spread it with the help of a shovel or a rake.
-
3
Take a rake and distribute a layer of sand or any shredded plastic on the top of gravel. After that, you have to make an assessment of all the materials which you intend to use for your round pen. You can use livestock panels which are very easy to assemble and are moveable. If you want to use wood in your round pen, you will have to acquire some labour force for it.
-
4
Install all the panels and put the gate in its place according to the measurements you took in step 1. Then, move the panels according to your requirement and insert their pins to connect them with each other.
-
5
Take a fence post slammer and drive all the steel posts in all the panels. Now, you have to secure all the connected panels with the help of 20-gauge wire.
-
6
In the end, just tighten the wire with the help of pliers.
 by 4 inch (10.16 m) posts
- Panel pins
- Steel posts
- Sand or shredded plastic
- Livestock or wood panels
- Calculator
- Gate
- Fence post slammer
- Screwdriver or hammer
Next%20stop%3A%20Pinterest "Pin It")
