How to do Map Nail Art Step by Step
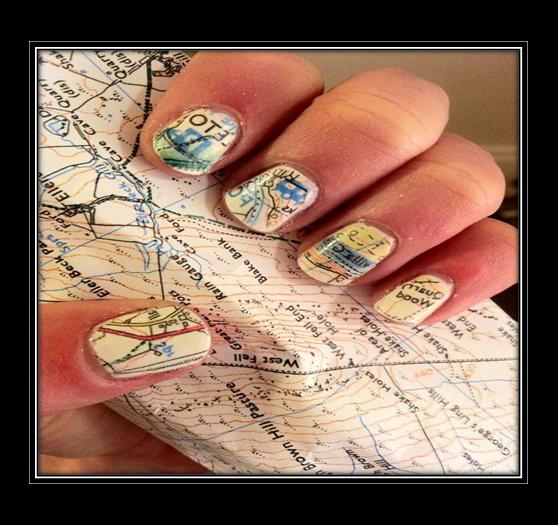
Are you looking for fine-looking ways to give a lift to your personality? Nail Art can add an exclusive style to your nails, adding up attractive embellishments to your hands. You may have seen scrapbook paper nails, flower nails, and newspaper nails etc, but have you seen Map Nails? It is an exceptional nail art technique that automatically grabs attention of the people around you. With a little practice and a lot of staying power, you can make your own gorgeous Map Nail Art designs in order to highlight the overall look of your nails.
Read the super-simple steps given below and do your own Map Nail Art at home:
Things you will need to do Map Nail Art:
– Map
– White or light colored nail polish
– Top coat nail polish
– Rubbing alcohol
– Small spray bottle
– Scissors
– Cotton pads


Instructions
-
1
Pick a small sharp scissor and cut out a section of a map to fit the shape of your nails. Set them aside until you paint your nails.
Note: Use any of the old maps from your book rack, cut it out from your old books or go online and download it.
-
2
Apply two thin coats of any of your favorite light colored nail polish to your nail and let them dry completely before moving on.

-
3
Add some rubbing alcohol to a cotton ball or cotton pad and apply it to your painted nails.
Note: Handle one nail at a time, otherwise, it will create a messy look. -
4
Pick one of the map cuttings and carefully place it on the specific nail with the printed side down. Now, lightly press it down with a dry cotton pad. Hold it for approximately 15 to 20 seconds and then remove the cotton pad.
Note: Do not hold the cotton pad very tightly as moving it slightly can destroy the Map Nail Art design. -
5
Repeat step 4 with the remaining nails. Wait for a few minutes until all nails dry well.
-
6
Peel the map cuttings away from your nails with great care to divulge the Map Nail Art.
Note: Peel the cuttings off one by one.
-
7
Top the Map Nail Art with a clear top coat to give it more attractive and shining look.
Note: Apply swift strokes of top coat from top to down in order to keep the map designs from smudging.


