How to Knit a Seafoam Stitch
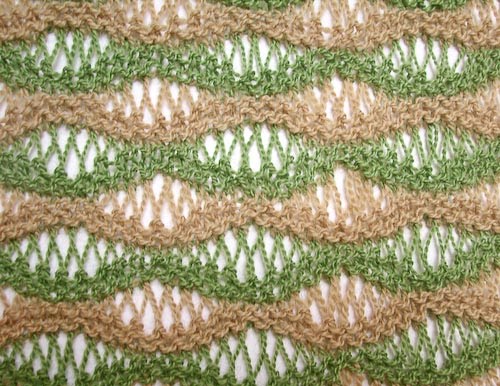
Stitching is a real art and there are a number of different ways it can be performed. A same piece of clothing can be stitched by following different patterns of stitching. It all depends upon how you knit the rows simultaneously and what patterns they make by the time you finish. Seafoam stitch is one of the most popular stitching pattern used to make comfortable and beautiful scarf or shawls by hand. It has to be done by starting with simple stitches in the first two rows, followed by a row of pattern stitches, again two simple rows and then again two pattern rows of stitches.
Instructions
-
1
A sport or double-knit weight yarn is considered to be ideal for seafoam stitch, as it is easier to tangle it while dropping stitches. However, it is also believed that thinner yarns make more attractive clothing.
-
2
Normally a needle size is mentioned on the ball band but it is suggested to use a longer needle than the stated size. 10 to 11 size needle will be very appropriate for seafoam knitting pattern.
-
3
Begin the real task by casting on a multiple of 10 stitches but do account for extra 6 stitches for the seafoam pattern and add 2 stitches on all sides of the border. Make sure to arrange all your knits in rows, one, two, five and six, since you have to work in two rows at a time before changing the pattern. 30-stitch swap will be ample for you to have a little practice.
-
4
Now the real seafoam stitch begins when you move on to the third row and you will need to make 6 stitches between yarn-overs and knitted stitches down the row. You have to be very precise with following the pattern. Start by yarn-over twice and then knit one stitch, then yarn-over three times before knitting the stitch, then yarn-over four times and knit a stitch, then yarn-over three times, knit a stitch, yarn-over twice and then knit six stitches to complete the row.
-
5
A yarn-over is made by taking the yarn in front of the needle and then bringing it over the right needle.
-
6
The fourth row shall be completed by slipping the yarn-over stitches off the needle and you will have some loose stitches at the end.
-
7
The seventh row will be completed in the same pattern as the third row and the eighth one will follow the manner of the fourth row.
