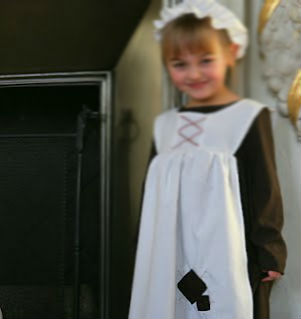
How to Make a French Maid Apron & Cap for a Child
Sewing may not be a leisure activity but it certainly saves people money. Prudent people or those who are running on a tight budget can always opt for sewing their children’s clothes and save money. If you are looking forward to get your child a French maid apron with a cap, you can try your hands at sewing these items for her.
The sewing is not at all difficult and will only require you a few things that are listed below. Once you have sewn these items you will find it easier to sew anything whenever the need arises in future and can try your hands at other clothing items.
Things required:
– Thread
– Measuring Tape
– Needle
– Pin


Instructions
-
1
Apron
Jot down the measurement of your child’s waist and hip-to-hip and from waist to the top of upper thighs. Mark two points on the fabric’s edge with the distance of hip-to-hip size taken earlier. Mark a point from the centre of the two marks which is the waist to thigh measurement. Now connect all three points in a semicircle.

-
2
Cut by following the curved line. Now, cut a fabric strip that is 4.5 inches wide and 24 inches from your child’s size as measured by you. Now, attach the lace with the apron using a pin so that their right sides face each other and start and end ½ inch from the top. Keeping ¼ inch from the edge sew the lace along with the apron.

-
3
Turn over the outer arched edge under a quarter of an inch so that the wrong sides face each other. Iron the edge and sew atop the apron around the curved edge at ¼ of an inch. Pin the aprons’ top with the top of waistband so that their right sides face each other. Next, match the apron and waistband’s centre. Sew the apron with the waistband at ¼ of an inch.

-
4
Now you need to fold both sides of the waistband in half, wrong sides (back side of the fabric) facing each other. Iron it.

-
5
Fold the waist band in half lengthwise so that the right sides face each other. Stitch the waistband’s ends together at 1/4th of an inch. Redo the same process for the other side. Turn the waistband with its right side outward, folding it over the top of apron. Stitch this waistband at a distance of ¼ inch along the base edge.

-
6
Cap
Take measurements from the back of your child’s neck to the top of the head and jot it down. Next, fold the cloth in such a way that the right sides face each other. Pin together. Draw a semi-circle on the cloth with its radius being 2 inches + your measurements. Now, cut the circle.

-
7
Sew lace around the cap’s edge by pinning it first to the cap so that its right sides face each other. Turn the lace over under ¼ of an inch and then sew it along the top edge at ¼ of an inch. Note down the measurements from the nape of your child to the top of her head. Now cut an elastic exactly the size you measured.

-
8
Divide the elastic into eight equal points and mark these with the help of pins. Draw lines on the wrong side of the cap in a way that marks into eight equal slices or chunks; in a way similar to slicing a pizza. Draw a circle on the wrong side of the cap at a distance of 1-inch away from the edge.

-
9
Place the elastic on the circle in a way that you (pin) the elastic’s end down. Now stretch the first section of the elastic so that it meets the first divider line along the circle and stitch it. Repeat this process all around the circle. The cap is ready for your child.


