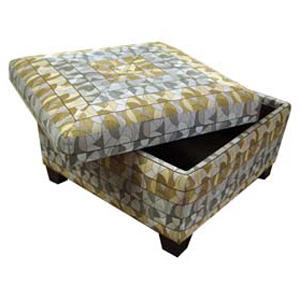
How to Build a Storage Ottoman

A storage ottoman is a great piece of furniture that is not only compact but can hold a variety of items. You can use it as a seat, footstool or storage cabinet because of the flexibility in the design of the ottoman allows many functions. Building a storage ottoman requires some carpentry skills and a little patience. Keep reading these simple guidelines to help you build a storage ottoman that will look great in your home.
Things Required:
– Measuring Tape
– Wood
– Wood Glue
– Screws
– Drill
– Saw
– Foam Pillow Material
– Fabric
– Sand paper
– Knife or Box Cutter
– Paint
– Scissors
– Wheels
– Hinges
Instructions
-
1
Plan and Measure:
First make a plan as to how big you want your storage ottoman. Measure out the height, width and length to get the overall dimensions. Take your time with the measurements as this will determine how much materials you will need to complete the project. Also, make sure to include any features like drawers or wheels in your plan. -
2
Decide on Materials and Cut:
Once you have made your plan and taken all measurements, it is now time to decide on the materials that you will need to build your storage ottoman. If you are going to use wood, then use pine or some 5/8 inch plywood. This material is durable and easy to cut. Make the pattern or design that you want for the sides of the ottoman and cut it accordingly.
Measure the lid and the bottom so that you can get the exact dimensions correct before cutting the wood. Also, make a pattern on the wood for any other pieces that you may need to complete the storage ottoman. Once you have all the pieces cut it is now time to put it together. -
3
Construct:
Use wood glue to attach the sides along with some screws. You can easily use the drill to get the screws in. Attach the bottom section to the storage ottoman using screws. This should give you a wooden box that is open on the top. Check for any splintering as you take some time to use sandpaper over the box.
Once it is nice and smooth, attach hinges to the inside top of the storage ottoman. This is where we will attach the lid so that it can open and close. However, before screwing the lid to the hinges, attach a small piece of wood in the shape of block to the end of the lid. This piece of wood will prevent the lid from hitting the top of the ottoman while opening and closing. Use some wood glue and screws to attach the piece to the lid. Now screw the lid to hinges so that it closes and opens easily. -
4
Build Foam Seat:
Use the foam seating material and cut it according the length and width that fits on top of the storage ottoman. You can use the box cutter or knife to cut the foam. Also, measure out the fabric that you have selected to cover the foam. Be sure the foam seating material easily slides in to the fabric cover once you are done stitching it together. -
5
Paint Ottoman:
You can now paint the bottom section of the storage ottoman in the color you prefer. Also, if you feel like adding other decorative elements, you can do that at this stage.


