How to Stay Organized with a Moleskine Planner
Writing down your daily activities and commitments in a diary helps you in managing your time more efficiently. However, new scheduling books/ diaries have many things in them that sometimes it becomes difficult to organise a daily planner.
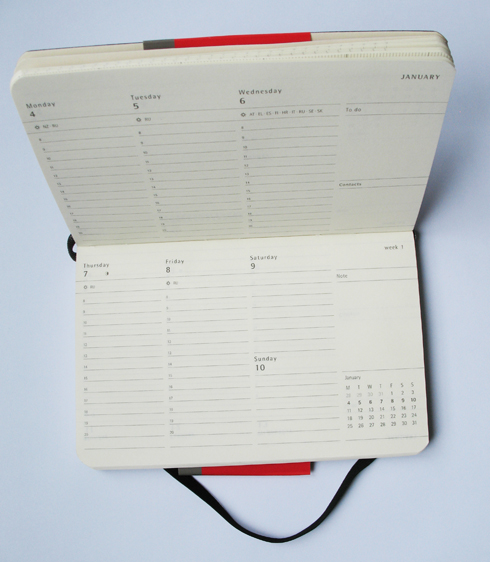
The Moleskine Project Planner is an example of such scheduling books that have many layers for daily, weekly and monthly goals. Moreover, it also has a folded layer to write down entire year’s projects and other notes related to your ventures.
Though, it is bit difficult to organise a Moleskine Planner but couple of tips can make things easier for you.


Instructions
-
1
Pick the right Moleskine project planner:
First and the foremost thing you should do is to pick the right scheduling books. They come in different sizes. You will find planners for daily routine and they will be big in size whereas there is also weekly planner which is compact in size. If you want more space to write then go for the daily Moleskine project planner otherwise pick the weekly planner. -
2
Write down the important information:
Now, when you have got the planner, start organising your scheduling book. First of all, put your name, important contact numbers in it along with some important dates. This is to give you a quick view of your schedule. -
3
Put all notes in small pocket:
The best thing about Moleskine project planner is that it always has a small pocket attached to the back cover. You can use it to keep all the notes and details of the tasks. Moreover, you can also put some important receipts and other papers in this pocket. -
4
Fill the columns:
Next thing you will do is to fill all the relevant columns. Write down important meetings, reminders and deadlines against appropriate dates and times. -
5
Colour-code entries:
Another technique to stay organised with a Moleskine project planner is to use highlighters. Select different colours and arrange all the tasks on the basis of urgency. This is a simple yet the most effective technique to check your planner quickly. -
6
Keep all the entries short:
You should just mention the time, date, location and event. Avoid writing details of the tasks otherwise it will be a mess. You can use sticky notes for details and put them in the back pocket of the project planner. -
7
Place to-do list on back of the paper:
You can make a to-do list on a daily basis and just stick it on backside of the relevant page.


