How to Add a Wind Effect to an Image
Adobe Photoshop has made life extremely easy for a lot of photo-editors, especially the ones who are not exactly experts when it comes to enhancing or simply changing an image. The programme has been designed in such a way that it remains extremely user-friendly and allows them to perform the photo-editing tasks without requiring any sort of professional knowledge.
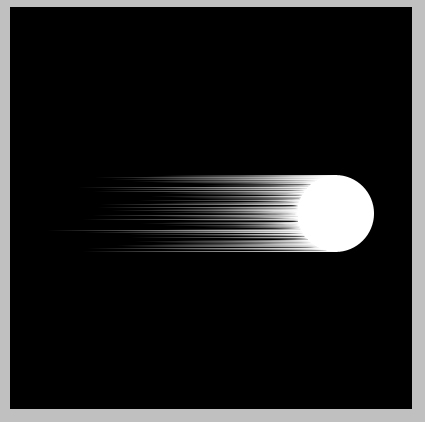
One of the many things that Adobe Photoshop allows you to do is to add a wind effect to an image. The effect can make the content of the image seems as if it is blowing away. It is really a cool effect and therefore definitely worth learning.


Instructions
-
1
The first thing that you need to do is to install Adobe Photoshop on your computer. Try to get your hands on the latest version of the programme if possible. You can either purchase Photoshop from the official website of Adobe or download it to your system, or you can visit your nearest computer shop and buy a copy from there. If you choose to purchase and download the programme from the official website, make sure you have a fast Internet connection. Adobe Photoshop is not very large, but it can take a lot of time to download if the speed of the Internet that you are using is not good. Try closing any other active downloads and also close down programmes that are using the bandwidth so that your photo-editing programme gets the maximum speed.
-
2
Once you have installed Adobe Photoshop on your computer, launch it. You will be prompted to register it in order to access the full features of the programme. Use the unique serial key provided to you by the developer or written on the back of the DVD that you purchase from the shop to register the programme.
-
3
After Adobe Photoshop is installed and registered, locate and click “File” on the menu bar. When the context menu appears, click “Open” and then browse through the folders to select the picture that you want to add the wind effect to.
-
4
After you have added the picture to the work-board, i.e. selected and opened the picture, locate “Filter” on the menu bar and click it to open a list of options.
-
5
Scroll your mouse cursor to “Stylize” and then select “Wind” from the new list that appears.
-
6
Once the “Wind” window opens, specify “Wind” in “Method” and then choose the direction of the wind.
-
7
Confirm the conversion of your image to a windy image by clicking “OK.”


