How to Connect a Video Switcher
Many times we get weary of connecting and disconnecting devices. A prime example of this is the process of connecting devices to the television. We can only connect a single external device with our television at one time, so we might have to disconnect a DVD player in order to connect another external device, like a camcorder. This can cause a lot of hassle and inconvenience.
However, in order to make the entire process easier, you can use a video switcher, which helps connect more than one device at a time. This video switcher can have multiple devices connected to it, but it has a knob that selects only one device at a time. In this way, it cuts down all the hassle of connecting and disconnecting external devices. Once you are done connecting the devices with the video switcher, and the video switcher with the television, all you need to do is rotate the knob and the device of your choice will be connected to your television.


Instructions
-
1
Connecting the television with satellite/ cable/ antenna:
Firstly, connect the in port of the satellite receiver or cable box with the coaxial cable coming out from the wall. Then, take the second coaxial cable and connect one end with the out port of the satellite receiver or cable box and the other end into the ‘in’ port of the television. In case you are connecting an antenna, just insert the other end of the antenna cable into the 'antenna in' or 'cable in' port of the television. -
2
Connecting the video switcher with the television:
The next step is to connect the video switcher with the television. There will be various types of video switchers available, with each having a different number of ports. However, irrespective of this fact, these ports will be grouped as either out ports or as in ports. Keep in mind that the in ports are meant for connecting the external devices while the out ports are meant to connect to the television. For this reason, there is usually a single set of out ports on a video switcher.
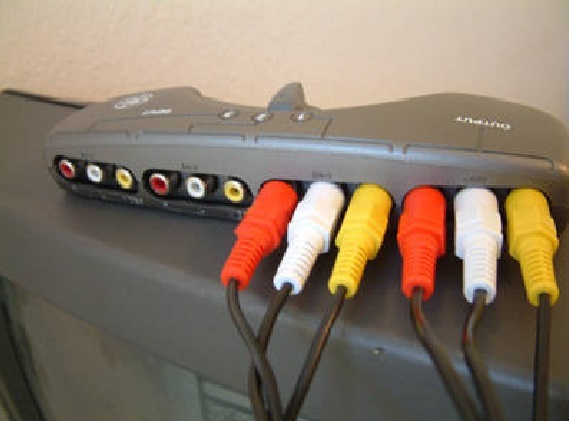
For ease of installation, the cables and ports on the video switchers are coloured coded in order to help people insert the right cables more easily. The yellow colour of the cable is meant for the video while the white and red ones are meant for stereo and audio streaming.
So, insert the yellow coloured video cable into the same coloured out port on the video switcher, and connect the red-white RCA stereo audio cables to the same coloured out ports on the video switcher.
Now, take the other end of each of the cables and insert them into the corresponding coloured A/V in ports on your television. -
3
Connecting the video switcher and external devices:
Now, locate the out ports on the external device and insert the audio and video cables into these ports. This can be a DVD player, a VCR, a gaming console, or a digital camcorder. Then, insert the other ends of these cables into the video switcher. So, first locate the in ports on the video switcher, then insert these cables into the same coloured ports. -
4
Verifying the connection:
Now that you have connected the devices, verify the connection by turning the tv on and selecting the A/V button. If it is not working fine, then you might have inserted the wrong cable into some port. -
5
Connecting more devices:
Repeat steps 2, 3 and 4 if you want to connect more devices.


