How to Create a Slideshow With Music
You want to put some pictures in a stream and make them flow with a nice background music. Well, few years earlier, it was a very difficult task and not everyone had access or knowledge to make such videos. Nowadays, even a child who has just started using computers for a year or so can do this and it is not very hard to perform that task as well. You just need some basic knowledge of how to use a video making software and you can accomplish the goal with ease. If you don’t know, you can learn the usage of windows movie maker here.


Instructions
-
1
Collect all the pictures that you want to use in the slide show and put them in one folder.
-
2
Choose the music that will be used a background song and it is better to use an instrumental music rather a complete song because the concentration of viewers will not be kept intact if you choose a song. However, it is your choice. Make sure the music is in mp3 format because no other format is recognized by the windows movie maker. It can accept the ‘wmv’ files as well but then the numbers of songs in the ‘.wmv’ format are close to nothing.
-
3
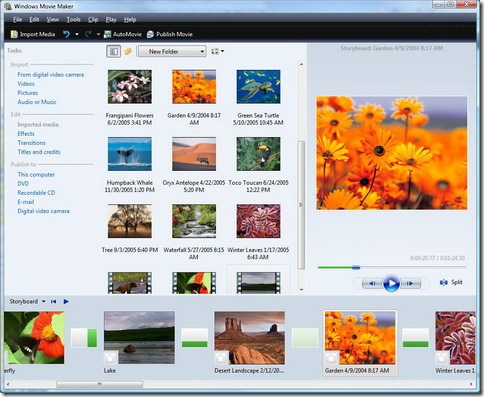
Open the windows movie maker. It is software that is installed automatically when you choose to install windows on your system. The version of the software can be updated via internet.
-
4
Open the folder that contains the pictures and the music that are to be used in the slideshow. You need to select all files (images and songs) that are to be used in the slideshow and drag them from the folder and drop them in the windows movie maker.
-
5
You need to save the project first at a suitable location so that if the power runs out or anything unwanted happens, your progress and the work are saved.
-
6
Drag and drop the pictures from the collections and put them in the timeline that is available to you at the bottom.
-
7
You need to click show timeline option to add music. You need to place drag and drop the music file in the audio portion of the software.
-
8
When you are done, save the file in the video format.


