How to Develop Film for Black and White Photos
Developing your own film is a hectic and difficult job, but once you get the hang of it, it will surely help you achieve greater control over the final production of your images. Most professional photographers prefer to develop their own films. A darkroom is the most important and the key factor here. After you have secured a darkroom in your apartment, you then need the right chemicals, tanks and containers for developing the film. Keep reading this article to learn how to develop film from black and white photos.


Instructions
-
1
The first step is to take all your equipment including the film in a lightproof room.
-
2
Arrange everything on the table, and turn the main lights off and open the canister with the film in it.
-
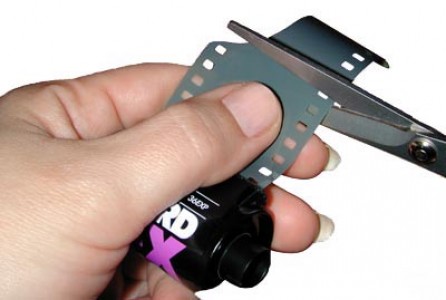
3
Now take the film out and cut the free end in order to get a straight edge, you now need to insert the edge into a clip which is at the centre of the reel.
-
4
Now thread the film and pull the end of the film off to remove the tape. The reel now needs to be placed in the developing tank.
-
5
In this step, you now have to mix the exact amount of chemicals in the containers which will help in developing the photos.
-
6
You need to pour a developer in to the tank which you are to use for developing the pictures.
-
7
Remove the bubbles in the developer for which you may need to tap the tank a few times.
-
8
For the first fifteen minutes you need to turn the tank over and then back in its original position. You need to repeat this after every thirty seconds during these fifteen minutes.
-
9
The container now needs to be filled with the developer, which means you have to pour it out of the tank and into the container.
-
10
With the developing tank empty now, pour stop-bath into it. Leave the stop-bath in the tank for about a minute.
-
11
You now have to replace the stop bath with a fixer. Do this by pouring the stop bath out.
-
12
Remove the bubbles in the fixer and shake it for about 15 seconds, repeat this after every minute.
-
13
You can now pour the fixer back in its bottle.
-
14
After removing the lid of the tank, you need to run water into it. Keep running the water for about fifteen minutes.
-
15
The wetting agent now needs to be added to the water.
-
16
The film should now be removed from the tank. Then you need to attach two clips on each end of the film.
-
17
A dry area needs to be selected for hanging the film so it can dry.


