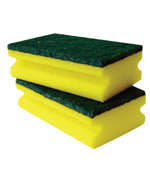
How to Disinfect your Kitchen Sponge

I’m sure the following thought has crossed all of our minds as some point. Considering the amount of wiping and cleaning that we do with our kitchen sponges and the various things we expose them to, is regular soap and water enough to keep them as clean as we would want? Truthfully the answer is no. Warm and wet sponges represent a veritable breeding haven for bacteria and germs.
Thankfully, sterilizing your kitchen sponge is a relatively easy and quick process that can be done in and around the kitchen. The following Step by Step Guide details what is required to safely and effectively sterilize your kitchen sponge.
Note: It is recommended that you use one of the following processes as often as daily or at least weekly.
Instructions
-
1
What You Need
In order to sterilize your sponge you will require your sponge, your sink and your microwave and a microwave safe bowl. The other method that will be outlined below involves cleaning with bleach, meaning you will also liquid bleach. -
2
Rinse the Sponge
The first step is rinsing your sponge thoroughly with warm running water to ensure all excess food and debris is removed.
Note: Do not wring out any excess liquid from the sponge. The wetter the sponge, the better it is for the process. -
3
Bowl It
Place the now rinsed sponge into the microwave safe bowl along with approximately half a cup of water. As microwaves use moisture to cook, this added water will increase the impact of the cleaning technique.
If you are electing to use bleach, you will not need the following 2 Steps. Instead, add half a cup of the bleach and half a cup of water to your bowl. Insert the sponge and allow it to sit in this mixture for 5 minutes. Proceed to Step 6. -
4
Microwave and Watch
Place the bowl in the microwave and set the unit for 2 minutes on your microwave’s highest setting. Setting your microwave varies based on manufacturer and model.
Note: It is very important to keep an eye on the sponge while it is in the microwave heating. Dry sponges could pose a burning or fire hazard (good thing you didn’t wring the sponge and then added water to the bowl). -
5
Cool and Remove
Once the 2 minutes is up, allow the bowl to sit in the microwave for 2-3 minutes to cool. Once this time has passed, remove the bowl from the microwave. Be careful and touch the bowl cautiously as it may be hot to touch.
Wait for the water to cool and remove the sponge from the water. While this time passes, clean the area where you usually keep the sponge. Place the sponge in its designated area when it is cool enough to remove from the water. -
6
Rinse the Sponge
After 5 minutes in your bleach solution, remove the sponge and rinse it thoroughly. Be sure to wring the sponge to ensure all bleach has been washed out.
Note: While the 5 minutes is on going, feel free to rinse and clean the area where you usually keep your sponge.


