How to Get to the iPhone Root Directory
Apple has designed their iPhone smart phones to be a closed system, and it is necessary prior to using your iPhone to have it jailbroken, so you can easily use it and access your root directory. Root directory of the iPhone consists of information and files that are for the user rather than the iPhone’s operating system.
To personalise your iPhone you need access to your root directory, so you can change the settings, copy or delete and of the files in the directory. This is also important if you want to customise your iPhone and also customise many of the apps that you are using on your iPhone.


Instructions
-
1
To access your root directory on your iPhone, first you need to log on to your computer and go to Digidna's DiskAid website. There you will have to download on to your computer and follow the steps to install the software onto your computer. You can purchase the DiskAid software or you can always use a 30 day free trial for the software. When the software is downloaded onto your computer, click on the DiskAid icon to start the process.
Image courtesy: diskaid.soft32.com

-
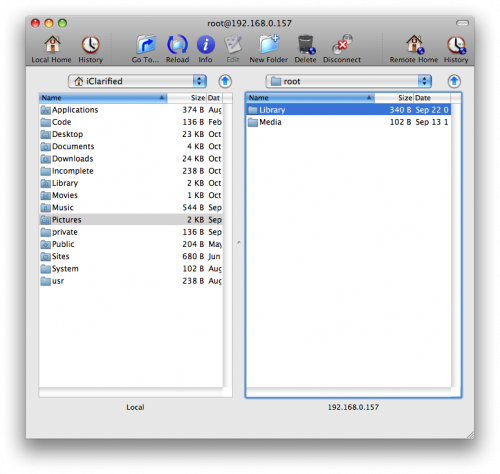
2
You will need to connect your jailbroken iPhone to the computer using the data cable. Once the program is installed, you will see a “Root Folder” option on the lower left hand corner of the DiskAid program. The folder will be saved as “DiskAid Folder” as per the default settings, but you will need to change it to “Root Folder.” When you click on the “Root Folder” the DiskAid program will issue a warning, but go ahead by selecting the “Go Ahead” option. DiskAid will now make two partitions, and on the left hand side you will be able to see files and information in your root directory.
Image courtesy: gizmodo.com

-
3
You will have your files and folders displayed in front of you. If you wish to access any folder, you will have to click on it and go to the middle column of the DiskAid program. There you will see the contents of the folder you selected. By double clicking on the file in any column, you will open the file, and from there you can copy, delete or change any file in your root directory. If you wish to add a file to your root directory, you will need to drag the file to appropriate folder of the root directory, and this function will save the file on to your iPhone automatically.
Image courtesy: syncplicity.com


