How to Install a Dryer Vent
The installation of a dryer vent to the outside of your house is not an option – it is basically a most important requirement. It helps in keeping the potentially harmful gases and fibers out of your house by sending them out into the open air. You do not require calling any repairing or Installation Company for this purpose as you can easily accomplish it yourself. It will take you hardly 30 to 45 minutes to successfully install the dryer vent. In this way, you can save your money and time.
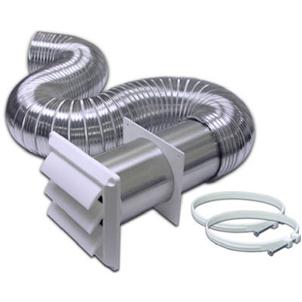
Things Required:
– Power or electrical drill
– Hole saw
– Tape measure
– Screwdriver
– Caulking gun
– Level
– Dryer vent
– Caulk Gun
– Wood screws
– Hanger straps
– Foil tape
– Coat Hanger
– Carpenter’s level or bubble Level


Instructions
-
1
Determine the location
Figure out where you want your dryer vent to be installed. Follow the given below options in this regard:
Basement:
If the dryer is installed in the basement, then it is better to bore the hole through the sill plate, located on your house’s base.
Main or second floor:
If the dryer is placed in the ground or first floor of your house, simply drill a small pilot hole through the corner of the wall near the dryer. Now, bend a coat hanger at 90 degrees and insert it into the hole, spinning it around. If the coat hanger does not hit anything inside the wall, it means the selected location is all set to go. However, if it hits something in the wall you will need to find another location around. -
2
Cut the Vent Hood Opening
Once you finalize the right location for installation, go outside and use a sharp hole-saw to incise the hole for the dryer vent pipe. Use a medium hole-saw and a saber saw to cut out the hole for the vent hood opening.
-
3
Install the Dryer Vent Hood
Now gently put in the duct tape through the drilled hole and fasten the hood to the siding, using some wood screws. Now load a caulk-gun and apply it around the ends of the newly installed hood, closing it up alongside the elements.
-
4
Attach to the Hood Duct
Now attach the duct length to the 90-degree elbow pipe.
-
5
Secure the Duct
Use straps to secure the duct in one place and apply foil tape right around its joints in order to seal them properly. Moreover, use set of straight sections with a fall along with a carpenter's level to avoid dampness from collecting inside the duct.
-
6
Install the Duct into the Dryer Vent Outlet
Place in another 90-degree elbow over the dryer’s outlet and connect a duct pipe to it. Gently slip the dryer back into proper place. Now use a bubble or carpenter level to level the duct. Fiddle with the lock and legs into place by contraction the locknut against the dryer.


