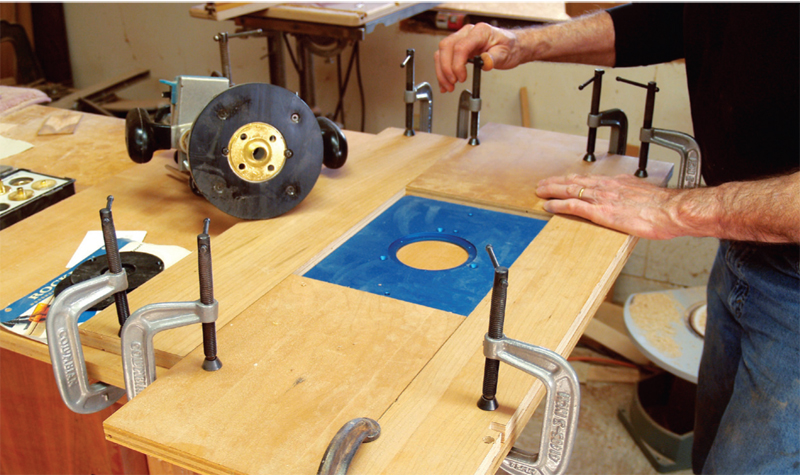
How to Install a Woodworking Router Plate

It is very important for you to have a router mounted in a table if you are using larger router bits. Although, you can buy a router table from the market, but it will cost you a lot of money. On the other hand, if you make the router table at your home, you can not only save your money but you can also use it to create some amazing woodworks at any time.
Things required:
– Router plate
– Medium density fibreboard
– 1/2-inch straight router bit
– Drill with 1/2-inch bit
– Table saw
– Double-sided tape
– Router with collar
– Jigsaw
Instructions
-
1
First of all, you have to place your router on the table. It is to be noted that you have to keep it at a place where you want to install it. You can use inches tape to note down the right measurements.
-
2
Then, take a table saw and cut around three-inch wide strips of fibre wood. Use the fibre wood of medium density.
-
3
Now, you have to attach 2 pieces of the fibre board with the help of double-side tape. Attach the outside corners of the router plate also along with the fibre board. Start attaching the longer corners
-
4
Take the measurement for two more pieces in order to cut and attach them along with shorter corners of the router plate. After attaching them, you have to remove the router plate.
-
5
Then, by using a router with around half inch collar and straight bit, cut the tabletop of the router. Now, you have to set the depth of the router to cut the plate accordingly. In this way, you will be able to nook for the router.
-
6
After that, take out the fibre board template which you made according to some specific measurements and make a hole in it by using the drill machine. You have to make the hole in the centre where the router plate is located.
-
7
Now, you have to cut the centre of the tabletop in order to recess the router by staying inside the plate. You will see a room for the router plate, just install it there and adjust it according to the level with the tabletop by using the instructions provided by the manufacturer.


