How to Install an Attic Fan
Don’t waste your time on thinking about attic ventilation, but if you have your own home then you need to owe it yourself to learn how it works. Insufficient venting leads to high loft temperatures that can reduce console lift utility bills and condense the valuable life of roofing materials. The excellent information is that, adding a few vents nearly constantly solves the problem, and for even greater efficiency, you may consider installing an attic fan as well.
Throw the hot air out of your house by installing attic and keep your home cool than before in summers. Learn how to make the installation with these directions and materials and tools lists.
Before You Begin
This guide is for basic attic installation process. But if you want to install different options for attic fan than it is highly recommended to hire an electrician as it needs additional process and wiring etc. Basically there are two speed units one is speed control switch allows you to decide the amount of air you want to move along with sound. It can be regulate with the help of thermostat switch by switching it on or off. There are different temperature levels; some units have its high temperature sensors which automatically blackout to avoid heat excess or any possibility of fire.
Inspect along with the local departmental building and decide either there is need of any permission, inspection for house fan or not. Whole house fan is not recommended in an attic with loose, exposed or blown in lagging as it creates strong air movement. One more drawback is it brings outdoor air into indoor. Fresh air may be usual, but as the unit draws in all that outside air it also invites in pollen, humidity, dust and other nuisances, not supportive for anyone who suffers from asthma.
Materials Required
– Drywall anchors
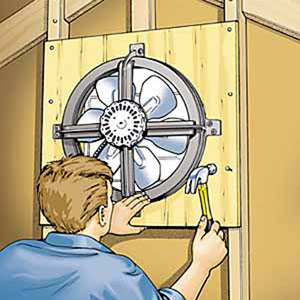
– Whole house attic fan with mounting hardware
– Wire nuts
– Duct tape
Tools Required
– Drill/driver
– Hammer
– Tape measure
– Drywall saw
– Carpenter’s level
– Wire stripper
– Stepladder


Instructions
-
1
Select a Position for your fan
Select a central location where the opening cannot be highly visible. Place it over a ceiling joist. In the attic fan its top should be at least 20 inches. Under the roof rafters and little away from any obstructions (doors or walls) the fan needs at least 1 square feet of vent space in the attic for each 750 CFM it delivers. “A CFM means the cubic feet of air that a fan can move per minute.” -
2
Mark out the cut
Mark the location on ceiling and make a hole by using drill machine, in the center of the drywall. Push a wire through this hole and run it into the attic and then look if it suits to your layout or not? Make sure to clear all the area near your working place and then lay down plywood or other boards in order to provide a secure space for you and other materials. -
3
Ceiling cutting from the attic
Cut about 2 x 12 inches small part of drywall from both sides joist in middle of the opening. Few of manufacturers facilitate the customers by providing cutting templates along with all important information about larger permanent opening for the ceiling louver. -
4
Ceiling cutting by using a template
Go back downward and rest the template over the small pattern, and use it to mark the larger notch. If you do not have any templates then follow the manufacturer instructions as to the size of the essential opening, and mark it on the ceiling. Next cut out the drywall by using drywall saw and put it where it is nailed to the bottom of the middle joist. Do not cut into or throughout the ceiling joist. Turn on the fan edge and pass it from end to end the ceiling joists. -
5
Installing level bracket
Next you need to install the joist mounting brackets (called saddles) inside the wood frame. These brackets fall over the center joist. Adjust height and location of the fan's frame exactly over the top limit opening, then drill direct holes and connect the brackets to the joist with screws. -
6
Join fan housing to joists
Fix the fan over the position that opens in the ceiling and protect it to the leveling brackets and joists with the bracket and screws provided. -
7
Install the fan skirt
Now you need to attach the skirt that covers the opening across the fan frame, screw it to the frame and to the joists at each sides of the ceiling opening.
The skirt too extends behind or between the joists and rests evenly next to the top face of the drywall. Use duct tape, if essential, to stick any gaps among the skirt and ceiling opening. -
8
Hook up the cables and wires
Make your connection according to manufacturer’s guidelines and run the wires to the unit. On a few units, it is compulsory to remove the fan blades to do this. A tiny set screw is typically provided to lock the blade on its ray. If you remove the blades, make sure to relocate them so they rotate generously without obstacle, and so the set screw is properly tightened before you operate the fan. -
9
Fasten the louvered panel
Now install the louvered panel from below to the ceiling. For safety purpose, use long screws through the panel frame into the ceiling joists. And in drywall anchor other rising screws should also be installed. Before switching the fan on once check its fitting and fixing. Fan’s vacuum should open these louvers instinctively during procedure.


