How to Make a Paint Brush in Photoshop
Despite stiff competition from InDesign and Corel Draw, Adobe Photoshop is still the basic graphics program for most web designers. It is attractive not only because of its relative simplicity but because of functions that make it possible to create the most incredible graphics.
To draw in Adobe Photoshop is easy, even if you’re not an artist. One of the most frequently used tools is a “brush”. The Internet offers a variety of free ready-made brushes. Choose your favourite brush and download it. You just need to add these brushes in a folder, select the desired colour and install it.


Instructions
-
1
Start Photoshop and create a new document by going to the section of the menu "File" on the very top line. Select "New" or by use hot keys “CTRL + N”.
-
2
Turn to the tool "Filling" by clicking the appropriate icon on the toolbar or simply press G after going to the main screen of the program. You need to create a backdrop with this tool to more clearly see the outlines of hands with which you work.
-
3
Choose a colour that you are most comfortable with as a background.
-
4
Create a new layer to contain the pattern brush. This can be done by pressing the keyboard short cut CTRL + SHIFT + N or click the appropriate icon in the Layers palette.
-
5
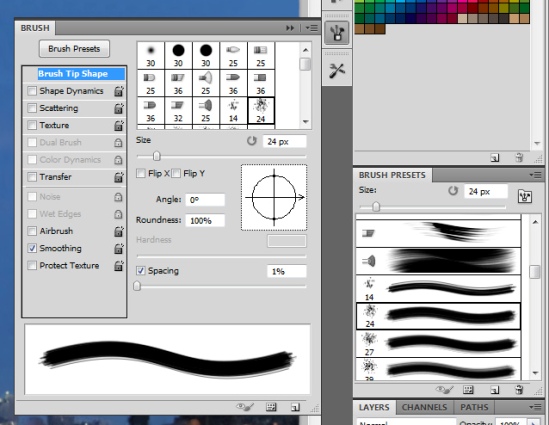
Switch the colour to the one which you wish to paint brush and click F5 on the keyboard in order to run the "Brushes palette." This can be done by expanding the menu graphics editor section "Window" and selecting the "Brushes".
-
6
Click "Brush Tip Shape" in the Brushes palette. It is placed on the left side just below the word "Brushes". So you do see additional area containing tools for more precise brushes. Tick the check box and contour brush roll over. Then you can run the inverted brush.
-
7
If you do not want to turn the vertical reflection of the brush “on” and “off” every time then create a new brush with a reverse loop. To do this, first make a fingerprint brush on a transparent layer. Open the menu section and click "Edit" then select the "Define Brush”. You just have to name it and save it to your hard drive, among other brushes and press “ok”. After that, it will appear in a palette of brushes.


