How to Make an Ellipse with Wax Paper
Making an ellipse with wax paper is an activity that high school students or college students perform in order to understand and explain the concept of an ellipse. By drawing a circle on the wax paper and then folding creases on it you will see how an ellipse is formed inside the circle. This will let the students explore this conic section more clearly along with its properties.
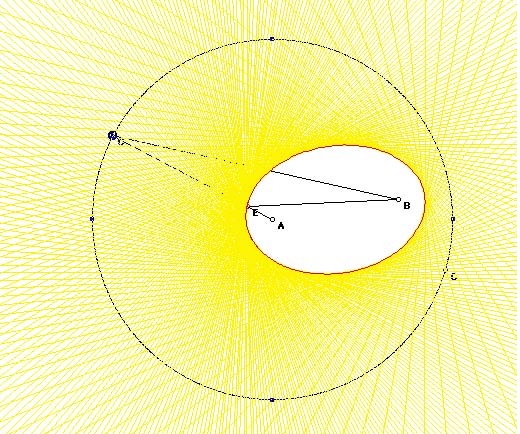
By definition, an ellipse is formed by combining all the points that are at the same distance from a point A which is drawn inside the circle, and the circle itself. Later you will be able to see that this point A and the center of the circle will form the two foci of the ellipse. Here’s how it can be drawn.
Things Required:
– 8.5 x 11 Wax Paper
– Compass
– Pencil
– Rubber


Instructions
-
1
Firstly take a wax paper and with the help of a compass draw a circle on it.
-
2
Next with your pencil mark the center of the circle as O. In addition to this, mark points all around the circle so that the creases can be made with ease.
-
3
Now mark a point anywhere inside the circle but make sure that its neither on the circle nor on its center. Mark this point as A.
-
4
Now once you have marked the center of the circle and a point inside the circle, its time to make creases. Hold the wax paper in your hand and make folds by putting the edge of the paper on the marked points of the circle. Make sure that the edge of the circle is aligned with the point A marked inside the circle.
-
5
Repeat this process until you are done folding creases all around the circle.
As you keep on folding the wax paper you might be able to see the ellipse forming inside the circle with the center of the circle O and marked point A as the foci of the ellipse.


