How to Repair Sink Drywall
Modern day houses and ceilings are often made up of sheets of drywall, also known as gypsum boards. These boards are plaster-like substance wrapped between two sheets of thick paper and are attached to the ceiling and walls by drywall screws. Normally these sorts of walls last for years but certain damages may occur to them, making them look sunk and giving a dented appearance. Repairing drywalls isn’t a difficult task to perform by yourself and you can do it without a professional assistance. However, specific tools will be needed to repair your drywalls and if you have them at home, you can perform this job like an expert.
Things Required:
– All-purpose mud
– Trowel
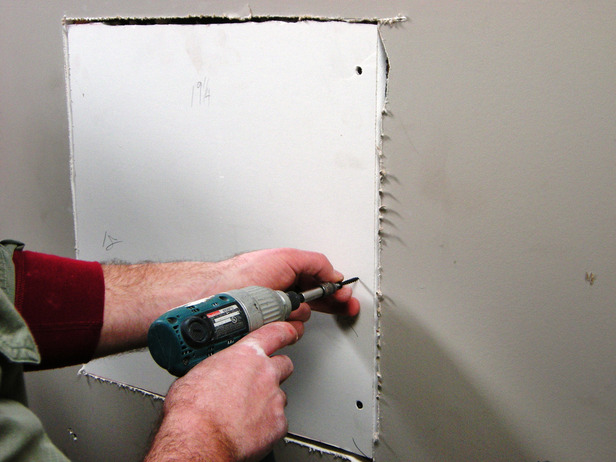
– Counter-sink tool
– Drill machine
– Paper tape
– Sand paper
– Water


Instructions
-
1
Start up by checking up whether the drywall has been properly screwed to the attachment studs. These studs hold up the gypsum boards in their right place and any loose screw might make your drywall look sunk. You need to check all the studs are firmly screwed and if not, tighten them up with a suitable screw driver. Normally, every gypsum board is supported by 5 screws, four on every edge and one in the centre.
-
2
You might need a counter-sink, a special tool attached to the end of a drill machine which will allow you to countersink all the screws deep into the drywall boards.
-
3
There might be certain cases when you have to replace the damaged gypsum boards and install a section of new drywall right from the beginning. You will require building mud and a trowel or a plastic knife to do the job. You can buy an all-purpose dry mud from the market and mix it up with water to make the adhesive paste.
-
4
Place a couple of inches of mud on the trowel and press it between the seams of the drywall boards. Fill in all the seams and screw holes with mud and then make a single press to smooth out the compound. Scrape off the excess mud which is squeezed out after pressing.
-
5
Cut the paper tape with length slightly more than the seams and press it into the mudded wall with your hands. Use the trowel to press the paper tape into the mud smoothly.
-
6
Cover up the inner side corners of the seams with 2 inches of mud and then cover the outside corners as well. Let the mud dry over night.
-
7
When the mud gets fully dried, use a sand-paper to rub it gently on the mud around the tape.
-
8
Apply the second coat of mud on all screws and joints, allowing it to dry over night once again. Use sand paper to grind again the other day if you feel irregular mud popping out.


