How to Airbrush With Glow in the Dark Paint
Airbrushing is an art and using it requires concentration, a steady hand and focus. If you happen to have these three traits then skills can be developed.
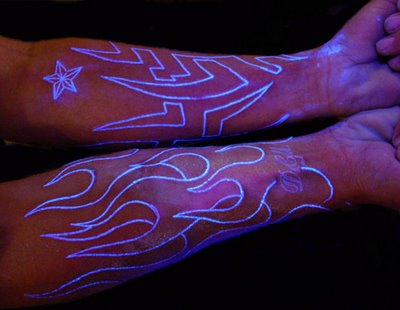
Airbrushing is great for glow in the dark paint. However, there are things to keep in mind when working with this paint.
It would be wise to keep in mind that although the paint is glow in the dark, the actual painting needs to be done with some light or in some cases, a black light.
Things Required:
– an air pump
– different airbrush heads
– a surface to paint on
– glow in the dark paint
– a design
– a mask
– a black light


Instructions
-
1
The first step is to prepare the surface. Clean the surface of any existing paint and add a base coat on which the glow in the dark paint will be added.
-
2
Set up the airbrush so you get the right consistency of paint you wish to use.
-
3
Set up the surface by placing the stencil on the wall or surface if you are about to go all freehand on the wall then have your various cut outs ready.
-
4
Delicately begin airbrushing the surface. Remember not to concentrate on one area too long as it will bring inconsistencies in terms of density. Instead use 2 to 5 smooth sweeping motions to reach the required density.
-
5
Make sure your hand is steady and take regular breaks. Also make sure that you are well hydrated and get some fresh air after every few minutes as paint is injurious to health if inhaled.
-
6
Use the UV light to make sure your painting is coming along as you want as the paint will take on a different appearance under the black light as compared to how it would look in normal lighting conditions.


