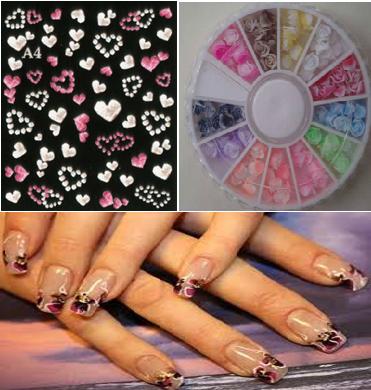
How to Apply Rubber Nail Art Decals

Rubber nail decals are simple to apply and give an impressive final touch to your formal as well as casual dressing. You can apply any of your favourite nail polish colours and finish it off with some of the beautiful rubber nail decals. You can find rubber nail decals according to different events and occasions. So, if you really want to look a little different for your upcoming party or get-together consider the rubber nail decals as they are simple and attractive.
Things Required:
Rubber nail decals
Scissors
Tissue
Tweezers
Topcoat polish
Rubber nail decals
Base coat
Nail polish
Orangewood stick
Topcoat
Sheet nail decals
Nail file
Instructions
-
1
First manicure your nails in order to enhance their overall look. This can be done at the salon or if you have the experience then just do this manicure at home. The basic premise is that you want your nails to be clean and neat before applying anything to them. Make sure that your nails and cuticles are clean. Also, make sure that there is no lingering nail polish marks still on you nails.
-
2
Apply one thin coat of any of your favourite dark base on all of your nails. Wait until the base colour dries completely. Be sure to do this while sitting under some light. You will want to apply the base coat carefully so that it is even and smooth. The texture of the dark base colour needs to be consistent so that the nail art really stands out and gives a nice impression. Always choose a dark base colour as it will make it a lot easier to apply nail art with any issues.
-
3
Now, grab a nail polish colour according to your choice and stroke on one coat of it on your nails. Wait for a few minutes until your nail polish dries well. Take your time while applying this coat of nail polish as you will want a nice smooth surface to be able to apply some nail art. Allow the nail polish to dry properly and make sure that the texture is even.
-
4
Brush another thin coat of the same nail polish on your nails. Wait for few minutes and allow the second coat of nail polish dry completely. It is very important that you keep this coat thin and very smooth. Essentially this is like a third coat so you do not want it to be too thick as you will need to just keep this coat as thin as possible.
-
5
Once your nail polish dries well, gently remove the rubber nail decals from the packet with the help of tweezers. Depending on the brand and style of the rubber nail decals, you will want to read the packaging for the instructions on how to apply these to your nails properly. Be sure to take your time as you apply the nail decals. You will want them to go on smooth and straight.
-
6
Now, pick up an orangewood stick and gently tap your rubber nail decals one by one in order to make sure that there are no air pockets. You definitely do not want any air pockets as they will ruin the design or patter of the rubber nail decals.
-
7
Apply a thick layer of topcoat nail polish to seal your nails properly. Take your time when applying the top coat as you basically want to make a nice smooth surface layer to protect the rubber nail decals.
-
8
Allow the topcoat dry completely and have fun.


