How to Build a Homemade Hydroponics System
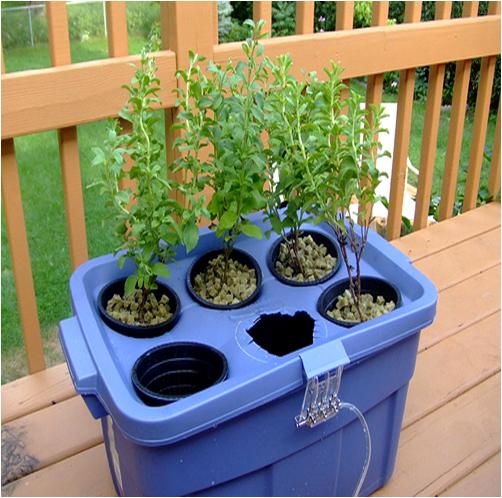
Building a Homemade Hydroponics System is one among the very cost-effective and simple projects. It is a useful and very unique gardening activity, allowing you to cultivate various plants without using soil as a base. All what you will require is a nutrient solution and a substrate and your plants will grow up fast and healthy. Moreover, this matchless technique is useful in pest controlling as it contains very small amounts of pests-leaching nutrients.
Commercial Hydroponics Systems operate well, but you can find them to be very costly. On the other hands, a homemade hydroponic system is reasonably easy to construct and keep up with. Moreover, it provides you with the same results as commercial ones.
Things Required:
– Two buckets
– Dark plastic tubing
– Fine wire mesh
– Aquarium pump
– Vermiculite
– Plant
– Hydroponic nutrient solution
– Automatic timer
– Knife or hand drill machine


Instructions
-
1
Select a bucket that you will be using to place your plant and bore a medium hole near its bottom (base), using a hand drill machine or knife. Keep the size of the tubing in mind while drilling the hole as both have to fit into one another smoothly.
-
2
Now fasten one end of the dark tubing right through the drilled hole, cover its tip with some fine wire mesh, and then seal it with silicon.
-
3
Position the tube to the direction where it would be nearly touching the bottom (base) and secure the inside (internal) and outside (external) of the drilled hole.
-
4
Use a hand drill machine and a sharp knife to cut another hole of the same size around the top of the bucket and repeat step 1 and 2 to fix it properly. However, position this tube somewhere slightly downward, if you like.
-
5
Arrange the second bucket in the same manner as you prepared the first one.
-
6
Now attach the hose at the right top of the first bucket (planting bucket) to the base (bottom) of the second bucket. Now the left behind hose will be attached to the aquarium pump. Use silicon to stick down the holes properly and leave it for few minutes to dry well before going ahead.
-
7
Fill up the first bucket to a level right below the top tube, using a vermiculite. You have the choice available to add in other substrates like pebbles and clay etc that are used to make the base of aquarium.
-
8
Now attach the bottom (base) tube from the plant bucket (first bucket) to the aquarium pump intake or ingestion point.
-
9
Moving on, tie the pump’s output to the bottom of the second tub and fix it properly.
-
10
Pour some hydroponic-nutrient solution into the second tub until fill well but not to the point that it is overflowing.
-
11
Now fill about one-quart of the plant tub with the same solution, making sure that the return- hose is nicely dipped in solution.
-
12
Plug up the pump right into the automatic timer that you can set to run about every four hours for approximately 15 to 20 minutes per time.
-
13
Switch on the plugged pump and enjoy your Homemade Hydroponics System as the rest will take care of itself.


