How to Install a Cordless Blind
Bring an alluring warm glow to your rooms with the gorgeous Cordless Blinds. These beautiful blinds gently filter light, and are simple to pull down and lift. You can find cordless blinds in many colors, designs and forms. They offer a safer option than your typical blinds as you would not have to worry about your kids or pets getting snarled in the cords. Moreover, you will love the simple, clean look of the cordless blinds that enhances the overall charm of your sweet home. Its installation requires proper attention, but if you thoroughly understand the directions and have willingness to endure, you can install the cordless blind within no time.
Things Required:
– Tape measure
– Lead pencil
– Metal mounting brackets
– An Awl tool
– Electric drill machine
– Bit-diameter
– Pan-head screws
– Brace Screws
– A level
– Wood shim or thin cardboard
– Screwdriver


Instructions
-
1
Mark bracket positions
Do away with any existing curtain along with drapery hardware that might hinder with installation of the Cordless Blind. Now use a tape measure to determine about 2 inches in from each side jamb and use a lead pencil to mark on the head jamb right above your window.
-
2
Mark the screw-hole locations
Pick one of the metal mounting brackets and grasp it up against the head-jamb, keeping it properly aligned with a pencil line. Now use an awl to mark pair of screw-mounting holes.
Repeat the same procedure for marking pair of screw-mounting holes for the second bracket at the other corner of the window.
-
3
Bore pilot holes
Drill pilot holes at each screw location, using an electric drill machine fitted with a medium bit-diameter. Make sure to hold the bit-diameter absolutely straight while boring up into the head-jamb.
-
4
Attach the mounting brackets
Clasp the bracket in place and make sure that it is aligned with the screw pilot-holes, drilled into the head-jamb. Now use two pan-head screws to secure the bracket. Fix the remaining mounting brackets, using the same procedure.
-
5
Check the brackets for level
Use a level to check out the straightness of the two mounting brackets, holding it firmly across them.
-
6
Insert a thin wood shim
If the mounting brackets are out of level by about 1/8 inch or less, then you can simply skip this step and proceed to Step 7.
If the mounting brackets’ distance is greater than 1/8 inch, slacken the screws on the higher-brackets and slide a wood-shim among the bracket and head-jamb. Now tauten the screws again and verify the mounting brackets for level.
-
7
Clip the Cordless Blind into the brackets
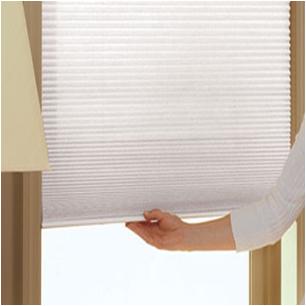
Use a screwdriver to loosen the small screws / brace screws located on the lower side of the mounting brackets. Now lift your Cordless Blind up to the head-jamb and gently hook the facade edge of the shade's head rail onto the protruding lip of the two mounting brackets.
Sway the rear of the head-rail back in the direction of the window and fix the brace screws in order to lock the shade into the mounting brackets as shown in the image.
-
8
Test the operation of the Cordless Blind
Once you tighten the brace screws, check whether the Cordless Blind works properly or not. Then seize the center of the bottom-rail and gently pull it straight down in order to extend the shade all the way to the stool or window sill. Your Cordless Blind is all set now, enjoy!


