How to Install a Truck Suspension Kit
Every vehicle has a different sort of suspension kit designed for it and you have to be careful to purchase the one specifically designed for your truck’s model. Despite the fact that every car has a different type of suspension kit, the basic steps involved in its installation are quite similar in all cases. You can install a suspension kit to your truck by yourself and all you need is some specific tools and the basic info required to perform this job. However, due care must be taken while performing this task.


Instructions
-
1
Before starting the installation of suspension kit, it is better to disconnect the negative terminal of your truck’s battery to be safe from any sort of possible electric shocks.
-
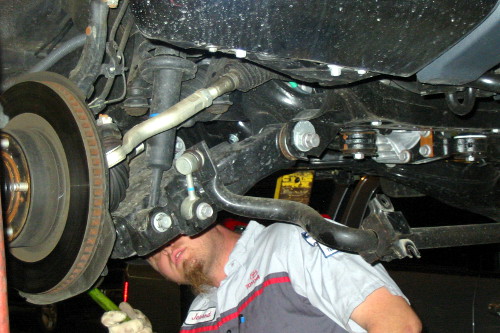
2
Now you have to lift up your vehicle so that you can install the suspension kit underneath it. Use a jack to lift up the truck sufficiently and roll under your vehicle. It is better if you lift up your truck over a pit make to repair vehicles, as it will be easier to do the job.
Image Courtesy: trailerlife.com

-
3
Now use an adjustable wrench to remove the nuts from the lower shock mounting stud of each wheel. Don’t lose these nuts and put them aside safely, as you will need them later.
Image Courtesy: motoristpassion.blogspot.com
-
4
Once the shocks have been freed from nuts, you can detach them by pulling them gently. If the shocks are stuck in their position, use a hammer or any other heavy tool to coax them out.
Image Courtesy: 355nation.net
-
5
You have to also disconnect the studs which hold the leaf-spring mounts to the frame. This will require removing more nuts and don’t mix them up with the ones you removed from the shocks.
-
6
Next, you will be required to remove the U-bolts, leaf springs and mounting brackets from the frame one by one. Be careful not to damage anything by applying excessive force.
-
7
Now you have to replace the old suspension springs with the new ones you purchased from the market and mount them on the brackets.
-
8
Also remove the old bushings from the frame and put new ones instead.
-
9
Affix the leaf springs and then the U-bolts in their position. See if the old bolts are rusted, it is better to use new ones to install accessories in their place.
-
10
It is finally time to install the new shocks to the lower mounting points. Tighten up the nuts and bolts very firmly so that they never lose their actual position.
Image Courtesy: tundraheadquarters.com
-
11
Take your vehicle to a repair shop to check for its alignment.


