How to Install a Tundra Extender
Although a truck is a good vehicle to carry a lot of goods from one place to another, there are times when you need to carry a dirt bike, motor skate or even a small boat on it. And, if you have a wife who is hell-bent on buying almost half of the grocery store, you know that you need to have an extension on your tundra. Adding an extension to the Toyota Tundra will increase its versatility and functionality. It is better to install a TRD Bed Extender as it will suit your needs fairly well.
Things Required:
– Tape measure
– Rubber mallet
– Torx-head screwdriver


Instructions
-
1
First, drop the tailgate and unbolt the cargo tie down loops with a torx-head screwdriver. Now, put the mounting bracket from the extender kit on the tie down loop and then tighten it with the torx-head screwdriver. You have to do this process on both sides of the vehicle.
-
2
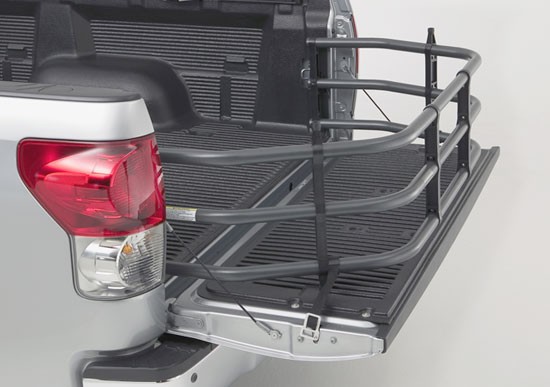
Now, put the curved ends of the bed extender kit over the tailgate and slide the tubes at the center into the holes that are located on the side tubes. Connect the two together and make sure that the connection is tight. Now, after lifting the bed extender, slide it into the bolted mounts to the bed. When you hear a click sound, it means they have settled down in place.
-
3
Do not worry if you experience some resistance to the Bed Extender when you first rotate it in the bracket. By tapping with a rubber mallet, you can move the right center stanchion over the right tube section. However, make sure that the center tubes are not scratched. If you use excessive force, it might damage the extender or even the vehicle.
-
4
Inserting wedges in the three pockets of stanchion on both sides of each is advisable as it will give the extension a proper grip. Make sure that the thinner wedges are at the center of the Bed Extender. Now, tighten all these three wedges after the stanchion is securely placed with a T-20 Torx wrench.
-
5
You also need to install an anti-chip tape to the tailgate latch. However, before doing that, clean the surface with a good cleaner and make sure that the cleaner does not get air dried.


