How to Make a Homemade Log Raft
Making a homemade log raft can be fun project for the whole family. There is nothing better than drifting on the river or lake with your very own homemade log raft. The best part is the fact that you can make a log raft while you are already in the outdoors either hiking or camping with friends and family. Putting together a homemade log raft is not difficult especially if you follow some simple methods that can definitely get you started in the right direction.
Things Required:
– 8 to 10 wooden logs
– Good quality rope

Instructions
-
1
Find logs:
You will need to find at least 8 to 10 long thick wooden logs. Make sure that these logs are thick and preferably straight. Although there will be some bends and knots in the logs, try to get wooden logs that can make a nice standing or sitting surface once they are joined together. -
2
Lay logs out:
Lay all the logs out and put them next to each other parallel to each other. You can put 6 or 8 long wooden logs together and keep 2 smaller wooden logs for cross support. The logs that are parallel to each other should be close to equal in length. -
3
Push logs together:
Push the logs that are sitting parallel to each other tightly. You will want each log pressed up against the other to provide a watertight seal. Do not worry if there are some gaps in the wood as these wooden logs will have some imperfections. -
4
Tie logs together:
Use good quality rope and tie the logs that are running parallel together. Make sure each log has rope wrapped around it which is running through the ends of the other logs as well. This will give a sort of weaving in and out pattern to the rope. Doing this will help you pull the logs together when you tighten the rope on the ends. -
5
Tie cross support logs:
Now flip the entire set of parallel logs that you have tied together over and place 2 wooden logs at the ends in a perpendicular fashion across the logs. These 2 wooden logs will act as cross support to give your log raft some strength. Use the rope to tie the cross support logs with the other logs that are running parallel. Make sure that each log is tied down to the cross support log as well. -
6
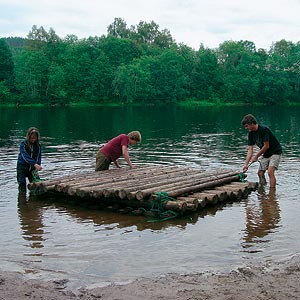
Flip over:
Now that you have tied the cross support logs you can flip the entire log raft over and gently slide it in the water. Hopefully your homemade log raft will be floating without too much water coming through the cracks. Climb on and enjoy your homemade log raft.

