How to Measure Wood for Cutting
Wood is used in many different forms for making countless items of daily use. However, before a piece of wood can be used for making a certain item, it needs to be measured and then cut to carefully so that the product can be of the desired dimensions. Measuring wood for cutting is an extremely simple task, provided that you are familiar with the use of different measuring tools such as a tape measure, framing square etc.
Things Required:
– Tape measure
– Pencil
– Framing square


Instructions
-
1
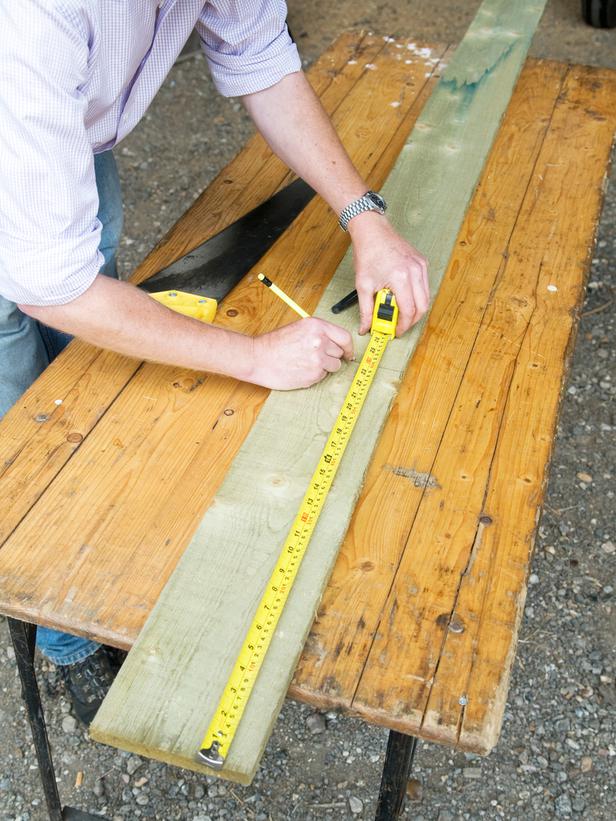
Place the piece of wood you want to measure for cutting on a flat surface. This is important because measuring a piece of wood placed on an uneven surface can often result into wrong measurements.
-
2
Pull out a small section of the measuring tape and secure the hook end of the measuring tape against one of the wood ends. Extend tape measure’s length until you reach the desired length of the wood piece.
-
3
In order to keep track of the correct length, mark the wooden piece at the point to which you had extended the tape measure in the previous step. Be sure to make a solid mark because if you make a very light mark, you might end up losing it and having to repeat the previous step all over again. Consider marking the length you measured in the previous step by making an arrow at the desired spot.
-
4
Line up a framing square through the centre of the arrow that you drew in the previous step. Following the length of the framing square, draw a line through the arrow. In order to keep a track of which side of the wooden piece you would be cutting, mark the side that you did not measure with an X. When you eventually start cutting the wood, ensure that your saw blade is placed on the side marked with X.


