How to Print a DVD Label in Word
If you have recently recorded a DVD, and you are planning to create a cover for it, then you should try using Microsoft Word for that purpose, as it provides a number of templates, which you can use to create your own DVD cover. You can download different types of DVD cover templates from the internet and then add your own text and adding clip art to the covers. Creating DVD covers using MS Word is really easy and you can customise it easily. So, what are you waiting for? Browse for your required designs and start editing them using MS Word.


Instructions
-
1
Create a New Microsoft Office Word Document and open it. In the “File” menu, click on “New,” to create a new cover for your DVD.
-
2
You will now see a "Search Online For" field available in the new window that opened. Write "DVD Cover" and press “Enter” key, or click on the “Go” button on the screen. In the search results, you will find "CD/DVD Case Inserts" appearing as the first link. Click on it, and click the “Download” button to download the DVD cover templates.
-
3
You can now start editing the DVD cover template. Start with editing the "Add Text and Graphics" sections by replacing the text with the one related to your contents in your DVD. You can also add pictures from your computer, by clicking the “Insert” menu and then selecting the "Picture From File” option. Apart from that, you can also add clip art by using the "Clip Art” button. The clip art section includes clip arts designed for different needs. For instance, if your DVD includes a video file of your daughter’s birthday party, then you can search for clip art related to birthday, by writing “Birthday” in the search box. Select the clip art of your own choice and insert it in your DVD cover. You can also increase or decrease the size of the clip art or the picture, according to your needs.
-
4
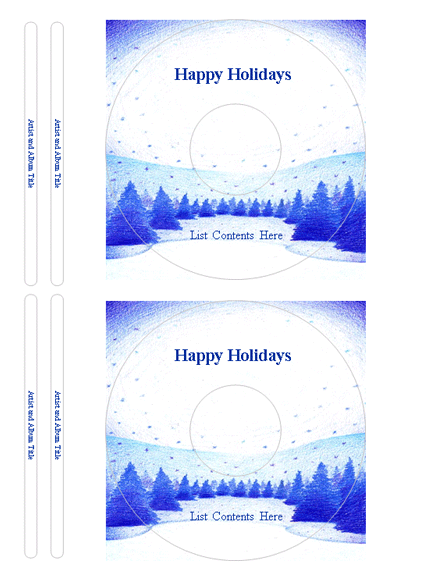
Now, change the "Enter Text for CD/DVD Spine Here" with the one related to your DVD contents. Make sure you change the text on both the sides of the spine.
-
5
Go to the “File” menu and click on “Print Preview”. You will now be able to have a complete look of the cover you have just created. If you find any problem in the cover layout or just want to amend something, close the preview and make the necessary changes.